Are you thinking about giving your car, home, or office windows a sleek, stylish upgrade without spending a fortune? DIY tint kits and tools put the power right in your hands.
Imagine saving money while achieving professional-looking results—all by yourself. Whether you want to reduce glare, boost privacy, or keep your space cooler, the right tint kit and tools can make the job simple and satisfying. In this guide, you’ll discover everything you need to know to get started, from essential tools to smart tips that help you avoid common mistakes.
Ready to transform your windows and take control of your tinting project? Let’s dive in!
Credit: www.windowtintsupplies.com
Choosing The Right Tint Kit
Choosing the right tint kit is key for a smooth and successful window tinting job. A good kit matches your needs and skill level. It also fits your budget and the type of windows you want to tint. Picking the right materials and tools saves time and effort. It also helps you get a clean, professional look.
Understanding the types of tint films and kit options guides your choice. You can find kits that include everything or just the film. Some kits are made for beginners. Others suit experienced users. This section breaks down the main factors to help you pick the best tint kit.
Types Of Window Tint Films
Window tint films come in different types. Dyed films block sunlight by adding color. Metalized films reflect heat and UV rays. Ceramic films use tiny ceramic particles for strong heat rejection. Each type offers different benefits and costs. Pick a film that fits your climate and privacy needs.
Pre-cut Vs. Roll Film Options
Pre-cut tint kits have films cut to fit specific car models. They save time and reduce waste. Roll films come in large sheets you cut yourself. Rolls offer more flexibility for unique windows. Beginners may prefer pre-cut kits for ease. Roll films suit those who want full control over size and shape.
Budget-friendly Kits
Budget-friendly tint kits include essential tools and film at low cost. They work well for small projects or first-timers. These kits may have fewer extras but still deliver good results. Look for kits with basic squeegees, spray bottles, and cleaner. Avoid very cheap kits that lack quality tools or film.
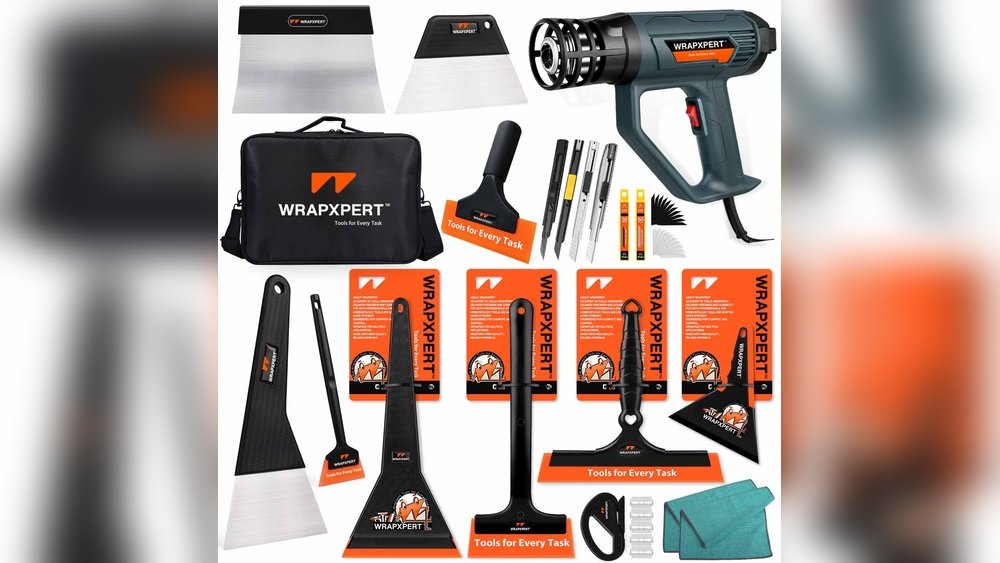
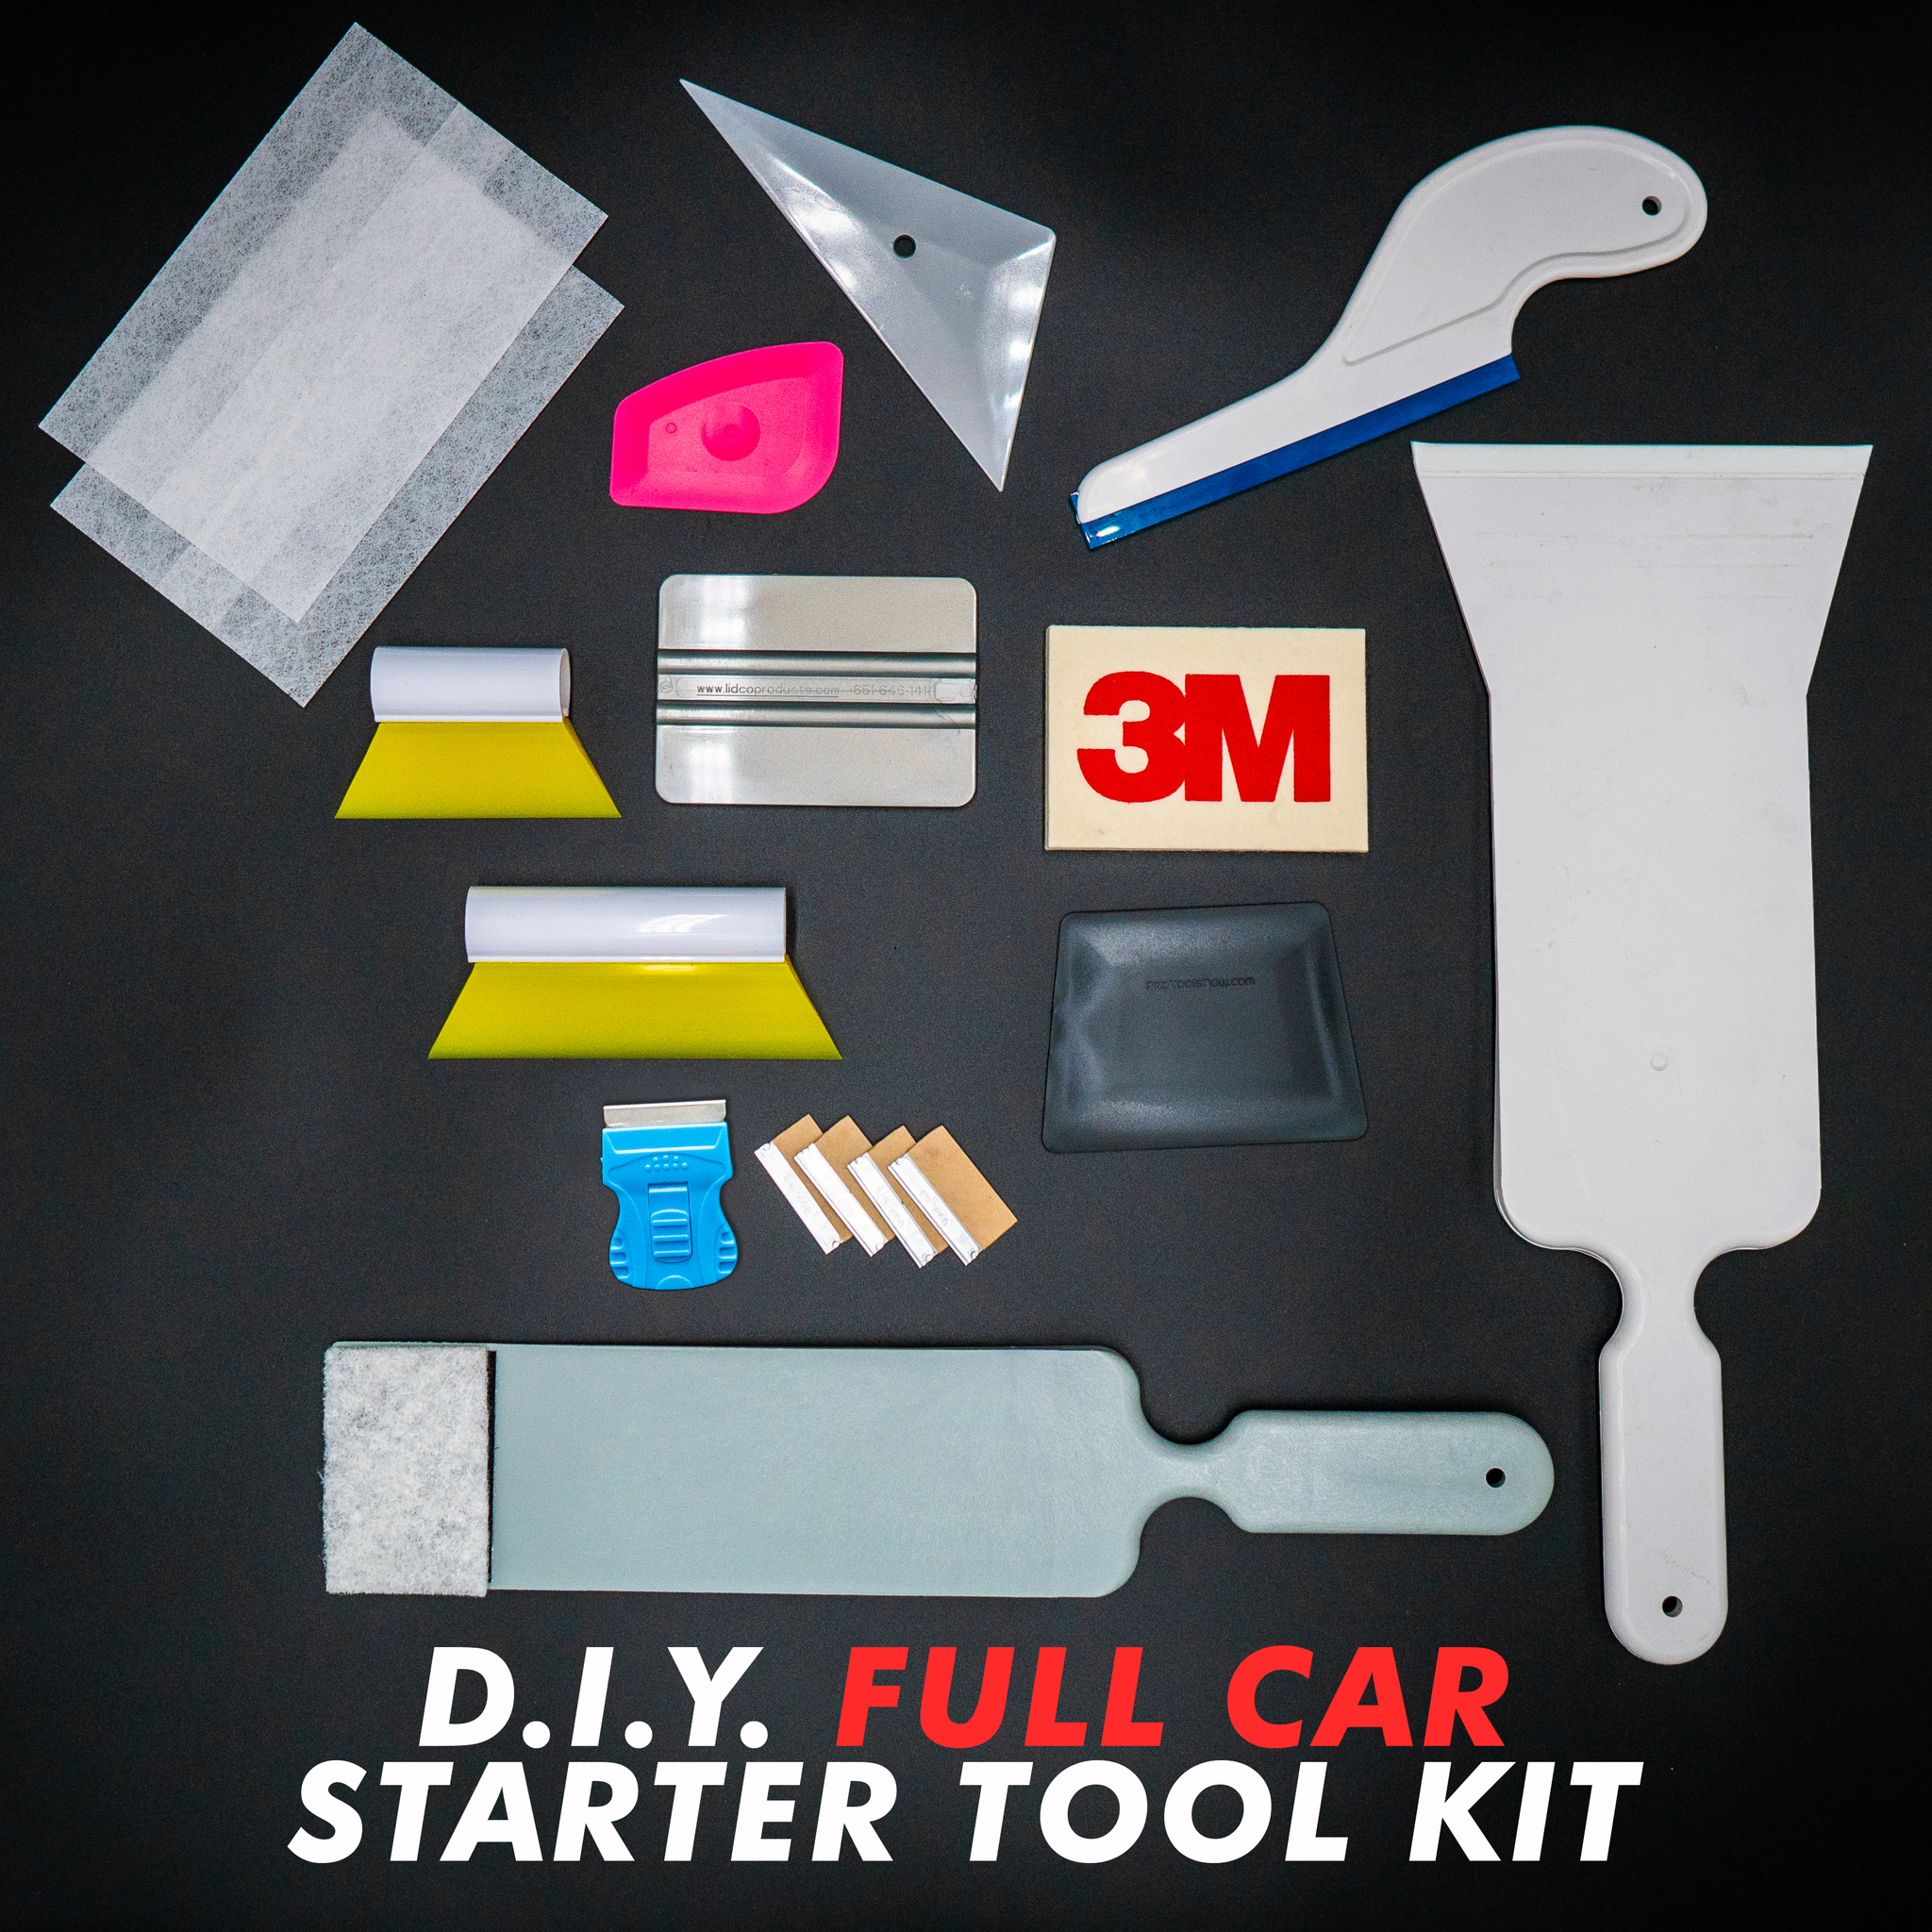
Essential Tools For Tinting
Tinting windows requires the right tools for a smooth and clean finish. Essential tools help apply tint film without bubbles or wrinkles. These tools make the job easier and improve the final look. Below are key tools needed for DIY tinting projects.
Squeegees And Applicators
Squeegees remove air bubbles and smooth the tint film. Soft rubber squeegees protect the film from scratches. Applicators help press the tint into corners and edges. Using the right squeegee ensures a clean, flat surface.
Heat Guns And Hair Dryers
Heat guns soften the tint film for better fitting on curved glass. Hair dryers can also warm the film but with less heat control. Applying heat helps the film stretch and stick tightly. This step prevents wrinkles and creases.
Cutting Tools And Knives
Sharp knives cut the tint film to the exact size of the window. Precision blades reduce tearing and uneven edges. Cutting tools are essential for trimming excess film after application. Always use a new blade for clean cuts.
Cleaning Supplies
Clean glass surfaces allow the tint film to stick properly. Use glass cleaner and lint-free cloths to remove dust and grease. Soap and water work for initial cleaning, followed by a dry wipe. Proper cleaning avoids bubbles and peeling later.
Preparing Your Vehicle For Tinting
Preparing your vehicle for tinting is an important step before applying any DIY tint kit. Proper preparation ensures the tint film sticks well and lasts longer. It also helps avoid bubbles, wrinkles, and dirt trapped under the film.
Take your time with each step. This will improve the final look and save you from redoing the work later.
Cleaning Windows Thoroughly
Start by washing your windows with soap and water. Use a clean cloth to remove all dirt and dust. Clean both the inside and outside of the glass. Any small particles left can cause bubbles in the tint film.
After washing, use a glass cleaner to remove grease or fingerprints. Wipe with a lint-free cloth to avoid fibers sticking on the glass.
Removing Old Tint
Check if your vehicle already has old tint on the windows. Old tint must be removed completely before applying new film. Use a heat gun or hair dryer to soften the old tint adhesive.
Peel off the tint slowly. Use a razor blade to scrape off any leftover adhesive. Be careful not to scratch the glass. A clean surface helps the new tint stick better.
Workspace Setup Tips
Choose a clean, dust-free place for tinting your vehicle. Avoid windy or dusty areas. The workspace should have good lighting to see clearly.
Gather all your tools and tint kit parts before starting. Keep a spray bottle with soapy water nearby to help position the film. Have clean towels and a squeegee ready for smoothing out the tint.
Work on a flat surface to avoid mistakes. Taking these steps makes the tinting process easier and faster.

Credit: mroyo.com
Step-by-step Tint Application
Applying window tint film yourself saves money and gives you control over the finish. A careful, step-by-step approach leads to the best results. Each phase, from measuring to smoothing, matters a lot. This guide breaks down the tint application process clearly. Follow these simple steps for a clean, professional look.
Measuring And Cutting The Film
Start by measuring the glass surface accurately. Use a tape measure to get width and height. Add a little extra to each side for trimming. Place the tint film on a flat surface. Cut it carefully with a sharp blade or scissors. Keep the edges straight for easy fitting later.
Applying The Film Smoothly
Clean the glass thoroughly before applying the film. Remove any dust, dirt, or grease with a glass cleaner. Spray water mixed with a bit of soap on the glass. Peel the backing from the tint film slowly. Position the film on the glass starting at the top. Press gently from the center outwards to stick it down.
Using Heat To Shape The Tint
Use a heat gun or hairdryer to warm the tint film. Heat softens the film, making it flexible. Carefully shape the film around curved surfaces. Keep the heat moving to avoid damage. Avoid overheating, which can cause bubbles or wrinkles. Let the film cool and set in place.
Removing Air Bubbles
Use a squeegee to push out air bubbles. Start from the center and work towards the edges. Apply firm, even pressure to smooth the film. For stubborn bubbles, lift the film gently and reapply. Wipe excess water from the edges with a cloth. Patience here ensures a flawless, clear finish.
Common Mistakes To Avoid
Applying window tint yourself can save money and offer satisfaction. Yet, mistakes happen often. Avoiding common errors leads to a smooth, clean finish. Focus on these typical issues to improve your results.
Incorrect Film Size
Choosing the wrong film size causes frustration. Too small a film leaves gaps and exposes glass. Too large makes trimming hard and wastes material. Measure windows carefully before cutting. Always cut a bit larger to allow adjustments.
Trapped Dirt And Dust
Dirt and dust under the film create bubbles and spots. Clean the glass thoroughly using a lint-free cloth and cleaner. Work in a clean, dust-free place. Even tiny particles can ruin the look. Use compressed air if needed to remove dust.
Uneven Application
Uneven application leads to wrinkles and air pockets. Use a squeegee to smooth the film from center to edges. Apply steady pressure to push out air and water. Take time to align the film properly before pressing down.
Overheating The Film
Heat helps the film stretch but overheating causes damage. Use a heat gun carefully and keep it moving. Avoid staying too long in one spot. Overheated film can bubble, warp, or lose tint strength. Let the film cool naturally after heating.
Maintaining Your Window Tints
Maintaining your window tints keeps them looking fresh and effective. Proper care helps the tint last longer and protects your investment. Simple steps can prevent bubbling, peeling, or discoloration. Regular attention ensures your vehicle’s windows stay cool and stylish.
Cleaning Tips For Longevity
Use a soft cloth or sponge for cleaning tinted windows. Avoid abrasive materials that can scratch the film. Clean with a mild soap and water solution. Spray directly on the cloth, not on the tint. Wipe gently in circular motions to remove dirt and dust. Dry with a microfiber towel to prevent streaks. Do not use ammonia-based cleaners as they damage the tint.
Avoiding Damage
Do not roll down windows immediately after tint installation. Wait at least a week for the film to cure. Avoid sharp objects touching the window surface. Keep pets’ nails away from the tinted glass. Park in shaded areas to reduce heat stress on the tint. Extreme weather can cause peeling or bubbling. Regularly inspect for small tears or lifting edges.
When To Replace Tints
Replace tints if bubbles or cracks appear. Discoloration or fading reduces the tint’s effectiveness. Scratches that impair visibility also call for replacement. If the tint peels from the edges, it no longer protects properly. Consider replacement every 5 to 7 years, depending on exposure. Timely replacement keeps your windows looking great and working well.
Where To Buy Diy Tint Kits
Finding the right place to buy DIY tint kits is key for a smooth tinting project. Several options offer different choices, prices, and qualities. Knowing where to shop helps you get the best tools and films for your car or home windows.
Online Retailers
Online stores provide a wide range of DIY tint kits. Websites like Amazon, eBay, and specialized tint shops offer many brands and sizes. Shopping online gives access to reviews and ratings from other buyers. Delivery is fast and convenient. Some sites offer free shipping or discounts on bulk orders.
Local Auto Stores
Local auto stores carry tint kits for quick purchase. Stores like AutoZone, Walmart, and Home Depot stock beginner-friendly kits and tools. Buying locally allows you to see the product before buying. Store staff can answer questions and suggest suitable kits. You can start your project the same day without waiting for shipping.
Comparing Prices And Quality
Price and quality differ widely between sellers. Cheaper kits may lack durability or clear instructions. Higher-priced kits often include better film and tools. Compare product details and customer feedback before buying. Choose a kit that fits your budget and project needs. Investing in quality saves time and avoids mistakes.
Advanced Tools For Professionals
Advanced tools for professionals bring precision and efficiency to window tinting projects. These tools help experts handle complex surfaces and deliver flawless results. Quality equipment reduces errors and speeds up installation. Professionals rely on specialized tools to work on challenging glass shapes and materials.
Curved Glass Tools
Curved glass tools fit perfectly to bend and shape tint films. They allow smooth application on curved windows without wrinkles or bubbles. These tools include flexible squeegees and contour pads. They help maintain film tension and ensure a clean finish on curved surfaces.
Specialized Heat Equipment
Heat equipment softens tint film for easier molding and adhesion. Heat guns and infrared heaters provide controlled heat for delicate work. This equipment helps remove air pockets and smooth out edges. It also strengthens the film’s bond to glass for long-lasting results.
Precision Cutting Devices
Precision cutting devices create clean, exact cuts on tint film. Sharp blades and cutting mats allow detailed trimming around window edges. These devices reduce waste by cutting only what is needed. Professionals use them to fit film perfectly to each glass shape and size.

Credit: www.amazon.com
Frequently Asked Questions
What Are Diy Tint Kits And Tools?
DIY tint kits include window films and essential tools for self-installation. They help save money and offer customization.
Which Tools Are Needed For Window Tint Installation?
Basic tools include a squeegee, utility knife, spray bottle, microfiber cloth, and a heat gun for smooth application.
How To Choose The Right Tint Kit For Beginners?
Look for pre-cut films, clear instructions, and starter toolkits that simplify installation. Check product reviews for reliability.
Are Diy Tint Kits Cost-effective Compared To Professional Services?
Yes, DIY kits are affordable and save labor costs. However, professional tinting ensures a flawless, long-lasting finish.
Conclusion
DIY tint kits and tools offer a simple way to improve your vehicle’s look. Choosing the right kit helps save money and time. Most kits include everything needed for a smooth installation. Practice patience and follow instructions carefully for best results.
With the right tools, anyone can tint windows successfully. Remember to work in a clean, dust-free environment. Enjoy the benefits of privacy and heat reduction from tinted windows. DIY tinting brings satisfaction and adds value to your car.