You want your car’s paint to look its absolute best—glossy, smooth, and like it just rolled off the showroom floor. Applying glaze is one of the easiest ways to bring out that deep, mirror-like shine and hide minor imperfections.
But how do you do it right? If you’ve ever wondered how to apply glaze to your car without leaving streaks or causing damage, you’re in the right place. This guide breaks down the simple steps you can follow to make your car’s finish pop and keep it looking fresh longer.
Ready to transform your car’s appearance? Let’s dive in.
Preparing Your Car
Preparing your car is the first step to a perfect glaze application. The paint needs to be clean, smooth, and free from dirt or contaminants. Proper preparation helps the glaze stick better and last longer.
Each stage in preparation improves the car’s surface. Start with washing and drying. Then use a clay bar to remove unseen particles. Finally, polish lightly to enhance the paint’s shine and smoothness.
Washing And Drying
Wash your car thoroughly using a car shampoo. Avoid dish soap as it can strip wax and damage paint. Use a soft sponge or mitt to clean the surface gently.
Rinse with clean water to remove all soap and dirt. Dry the car fully with a microfiber towel to prevent water spots. Make sure no moisture remains before moving to the next step.
Claying The Surface
Use a clay bar to remove bonded dirt and grime. This step makes the paint feel smooth to the touch. Spray clay lubricant on the surface and gently rub the clay bar over it.
Check the clay often and fold it to expose a clean side. Continue until the whole car is smooth and free of contaminants. Wipe off any residue with a clean microfiber cloth.
Polishing Basics
Light polishing removes minor scratches and swirl marks. Use a polish suited for your car’s paint type. Apply a small amount on a foam applicator or polishing pad.
Work in small sections using circular or back-and-forth motions. Buff off any excess polish with a clean microfiber towel. Polishing creates a flawless surface for the glaze to shine.
Credit: auto-glanz.co.uk
Choosing The Right Glaze
Choosing the right glaze plays a key role in achieving a deep shine on your car. It enhances your paint’s appearance and hides minor flaws. Picking the correct glaze depends on your car’s needs and your goals for its finish. Understanding the types, ingredients, and how long the glaze lasts helps you make the best choice.
Types Of Glazes
Glazes come in two main types: brushing and dipping. Brushing glazes contain gums that dry slowly and create a thick layer. They are good for filling in scratches and swirl marks. Dipping glazes dry faster and are usually thinner. They add shine but don’t fill imperfections as much. Choose a type based on how much correction your car’s paint needs.
Ingredients To Look For
Look for glazes with fillers like oils and polymers. These ingredients help mask scratches and add depth to the paint. Some glazes include carnauba wax or synthetic wax for extra shine. Avoid glazes with harsh abrasives; they can damage your paint. The right ingredients create a smooth, glossy surface without harming the finish.
Glaze Longevity
Glazes offer short-term protection, usually lasting one to two weeks. Rain and washing can remove the glaze quickly. They are not meant to replace wax or sealants but to boost shine between these applications. Use glaze regularly to maintain a fresh, polished look on your car’s paint.
Tools For Application
Applying glaze to your car requires the right tools for the best results. Using proper tools makes the process smooth and effective. It helps spread the glaze evenly and brings out a deep shine. Below are the essential tools you need for application.
Microfiber Applicators
Microfiber applicators are soft pads designed to hold and spread glaze. They prevent scratches on your car’s surface. These applicators help apply the glaze in thin, even layers. Use gentle pressure and circular motions for a smooth finish. They are easy to clean and reuse for multiple applications.
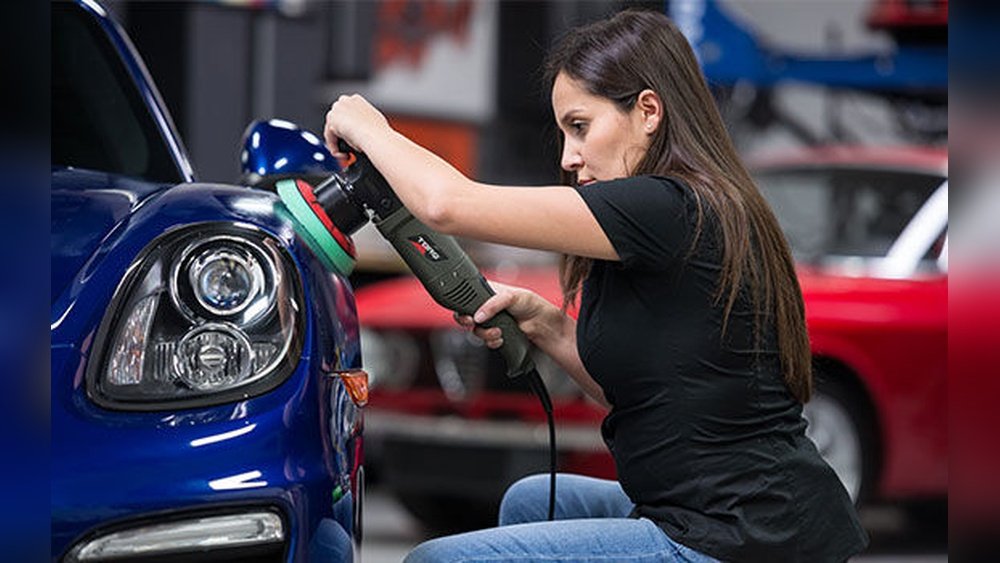
Polishers And Buffers
Polishers and buffers speed up the glaze application process. They provide consistent pressure and motion. This helps the glaze bond better to the paint. Use a dual-action polisher for safe and effective application. Keep the speed low to avoid overheating the paint. Always follow the tool’s instructions for best results.
Proper Cloths For Removal
After applying glaze, remove excess with the right cloths. Use clean, soft microfiber towels to avoid scratches. These cloths absorb residue without leaving lint behind. Wipe gently in straight lines to reveal a smooth, glossy surface. Change cloths when they become dirty for the best finish.

Credit: www.youtube.com
Step-by-step Application
Applying glaze to your car enhances the paint’s shine and hides minor imperfections. The process is simple with the right method. Follow these clear steps to get a smooth, glossy finish. Use a quality microfiber applicator for best results. Work patiently and carefully over small sections of your car.
Applying Small Dots
Start by placing small dots of glaze on the car’s surface. Dot the product evenly across a small area. Avoid putting too much glaze in one spot. This helps spread the product easily and prevents waste. Small dots allow better control during application.
Using Crosshatch Motion
Use a crosshatch motion to spread the glaze. Move the applicator up and down first. Then move it side to side, creating a crisscross pattern. This method covers the paint evenly and fills in tiny scratches. The crosshatch motion ensures no spots are missed.
Working The Glaze Into Paint
Gently work the glaze into the paint using light pressure. Think of it as giving the paint a soft massage. This helps the glaze bond well to the surface. Work slowly and cover the entire area with the glaze. Allow the product to haze before buffing it off.
Tips To Avoid Common Mistakes
Applying glaze to your car enhances its shine and smoothness. Avoiding common mistakes ensures the best results and protects your paint. Follow these simple tips to prevent issues during application.
Preventing Scratches
Always use a clean microfiber cloth or applicator pad. Dirt or grit on your tools can scratch the paint easily. Work gently in small sections to reduce pressure. Avoid circular motions; use straight, overlapping strokes instead. Keep your hands clean and free of debris while applying glaze.
Managing Drying Time
Check the glaze instructions for drying times. Do not let the glaze dry completely on the surface. Wipe off excess glaze while it is still slightly wet. Work in shaded areas to avoid fast drying caused by sunlight. If the glaze dries too fast, reapply a small amount and wipe quickly.
Layering With Sealants And Wax
Allow the glaze to cure fully before adding sealants or wax. Apply sealant or wax in thin layers for better protection. Make sure each layer bonds well by waiting the recommended time. Layering improves shine and durability when done correctly. Avoid mixing products with conflicting ingredients to prevent issues.
Aftercare For Lasting Shine
After applying glaze to your car, proper aftercare is essential. It helps keep the shine bright and lasting longer. Taking care of your car’s finish protects your investment and keeps it looking fresh.
Simple steps can extend the life of the glaze. Small habits make a big difference in maintaining that glossy finish.
Frequency Of Reapplication
Glaze does not last forever. It usually stays effective for about two weeks. Reapply glaze every two to three weeks for best results. This keeps the paint smooth and shiny. Too frequent application can cause buildup. Follow the product instructions to avoid this.
Protecting Against Weather
Weather can harm your car’s finish. Sun, rain, and dust wear down the glaze. Park your car in a shaded or covered spot. Use a car cover if parking outside. Wash your car regularly to remove dirt and grime. Avoid harsh chemicals that strip the glaze. Protecting your car from weather keeps the shine strong.
Maintaining Gloss Between Details
Keep your car shining between full details. Use a quick detailer spray for light cleaning. Wipe down with a clean microfiber cloth to avoid scratches. Avoid washing too often with strong soaps. Spot clean bird droppings and tree sap quickly. These steps help maintain the glaze’s glow.

Credit: www.chemicalguys.com
Frequently Asked Questions
How To Apply Glaze On A Car?
Clean and dry the car thoroughly. Apply small dots of glaze on a microfiber applicator. Spread evenly using crosshatch motions. Let it haze, then buff with a clean microfiber towel. Apply glaze after washing, claying, and polishing for best results.
What Is The Best Way To Apply Glaze?
Clean and dry the surface thoroughly. Apply glaze in small dots using a microfiber applicator. Spread with gentle, crosshatch motions. Let it haze, then buff off with a clean microfiber cloth. Apply glaze after washing, claying, and polishing for best results.
How Long Does Glaze Last On A Car?
A car glaze typically lasts one to two weeks. It offers shine but minimal protection and washes off easily with rain.
Do You Brush Or Dip Glazes?
You can either brush or dip glazes. Brushing applies glaze slowly and allows it to dry hard. Dipping glazes apply quickly and dry fast. Choose based on your project needs and glaze type.
Conclusion
Applying glaze to your car enhances its shine and smoothness. Use gentle, even strokes for best results. Take time to cover all painted surfaces carefully. Glaze lasts a short time but boosts your car’s look. Regular application keeps your paint looking fresh and glossy.
Enjoy the smooth finish and deeper color you achieve. Keep your car clean before applying glaze each time. This simple step makes a big difference in appearance. Your car will thank you with a brighter, shinier surface.