If you want your car’s paint to look flawless and shine like new, learning how to do paint correction is a game-changer. Maybe you’ve noticed scratches, swirl marks, or dullness ruining your car’s finish, and it’s frustrating.
But here’s the good news: you don’t have to live with it. With the right steps and tools, you can restore your car’s paint to a smooth, mirror-like finish. In this guide, you’ll discover simple, effective techniques to remove those imperfections and protect your paint for the long haul.
Ready to transform your car’s look and feel proud every time you hit the road? Let’s dive into how to master car paint correction.
Paint Correction Basics
Paint correction is a key step to restore your car’s shine and smooth finish. It removes imperfections that dull the paint. Understanding the basics helps you achieve a flawless look. This section covers what paint correction does, common paint defects, and the cut and polish process.
What Paint Correction Does
Paint correction fixes surface flaws on your car’s paint. It removes scratches, swirls, and oxidation. This process brings back the original gloss and depth. Paint correction does not repaint the car. Instead, it improves the existing paint by smoothing and polishing it.
Common Paint Defects
Cars often have scratches from daily use. Swirl marks appear from improper washing or drying. Oxidation happens when the paint fades due to sun exposure. Water spots and etching can also damage the surface. These defects reduce the car’s shine and value.
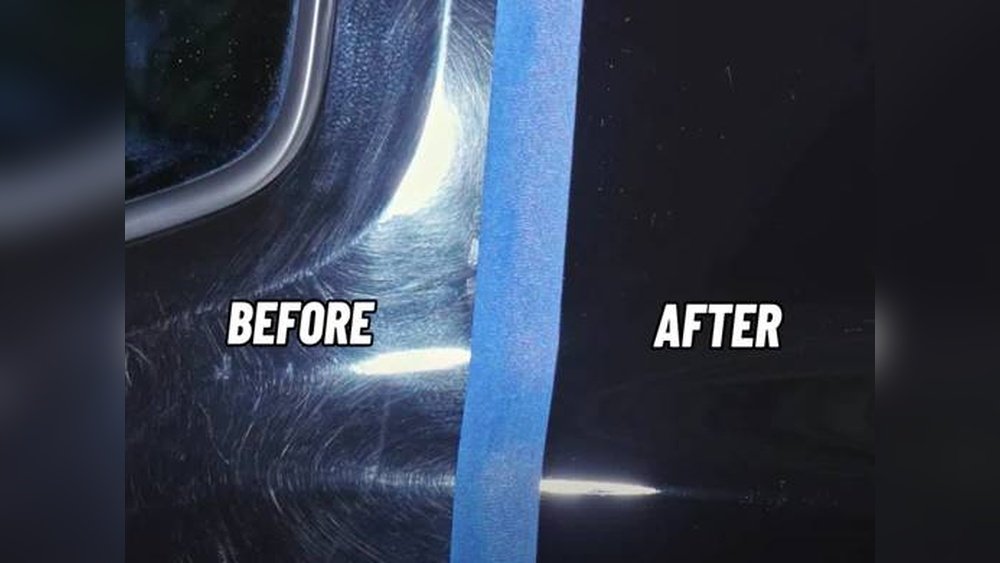
Cut And Polish Explained
Cutting removes the top layer of clear coat with a machine and compound. This step erases deeper scratches and defects. Polishing follows to smooth the paint and enhance gloss. It uses finer compounds and pads. Cut and polish together restore a mirror-like finish on your car.
Credit: www.ziebart.com
Preparing The Car
Preparing the car is the first and most important step in paint correction. It ensures the surface is clean and smooth. Dirt, grime, and contaminants can affect the polishing process. Taking time to prepare the car well will lead to better results and a flawless finish.
Start with thorough cleaning and remove all surface impurities. This prepares the paint for correction by exposing any scratches or swirl marks clearly. A clean surface also prevents damage during polishing.
Washing And Decontaminating
Begin by washing the car with a quality car shampoo. Use a soft mitt or sponge to avoid creating new scratches. Rinse thoroughly and dry with a microfiber towel. This removes loose dirt and dust.
Next, decontaminate the paint with an iron remover or similar product. This breaks down embedded particles like brake dust and industrial fallout. Removing these contaminants prevents scratching during polishing.
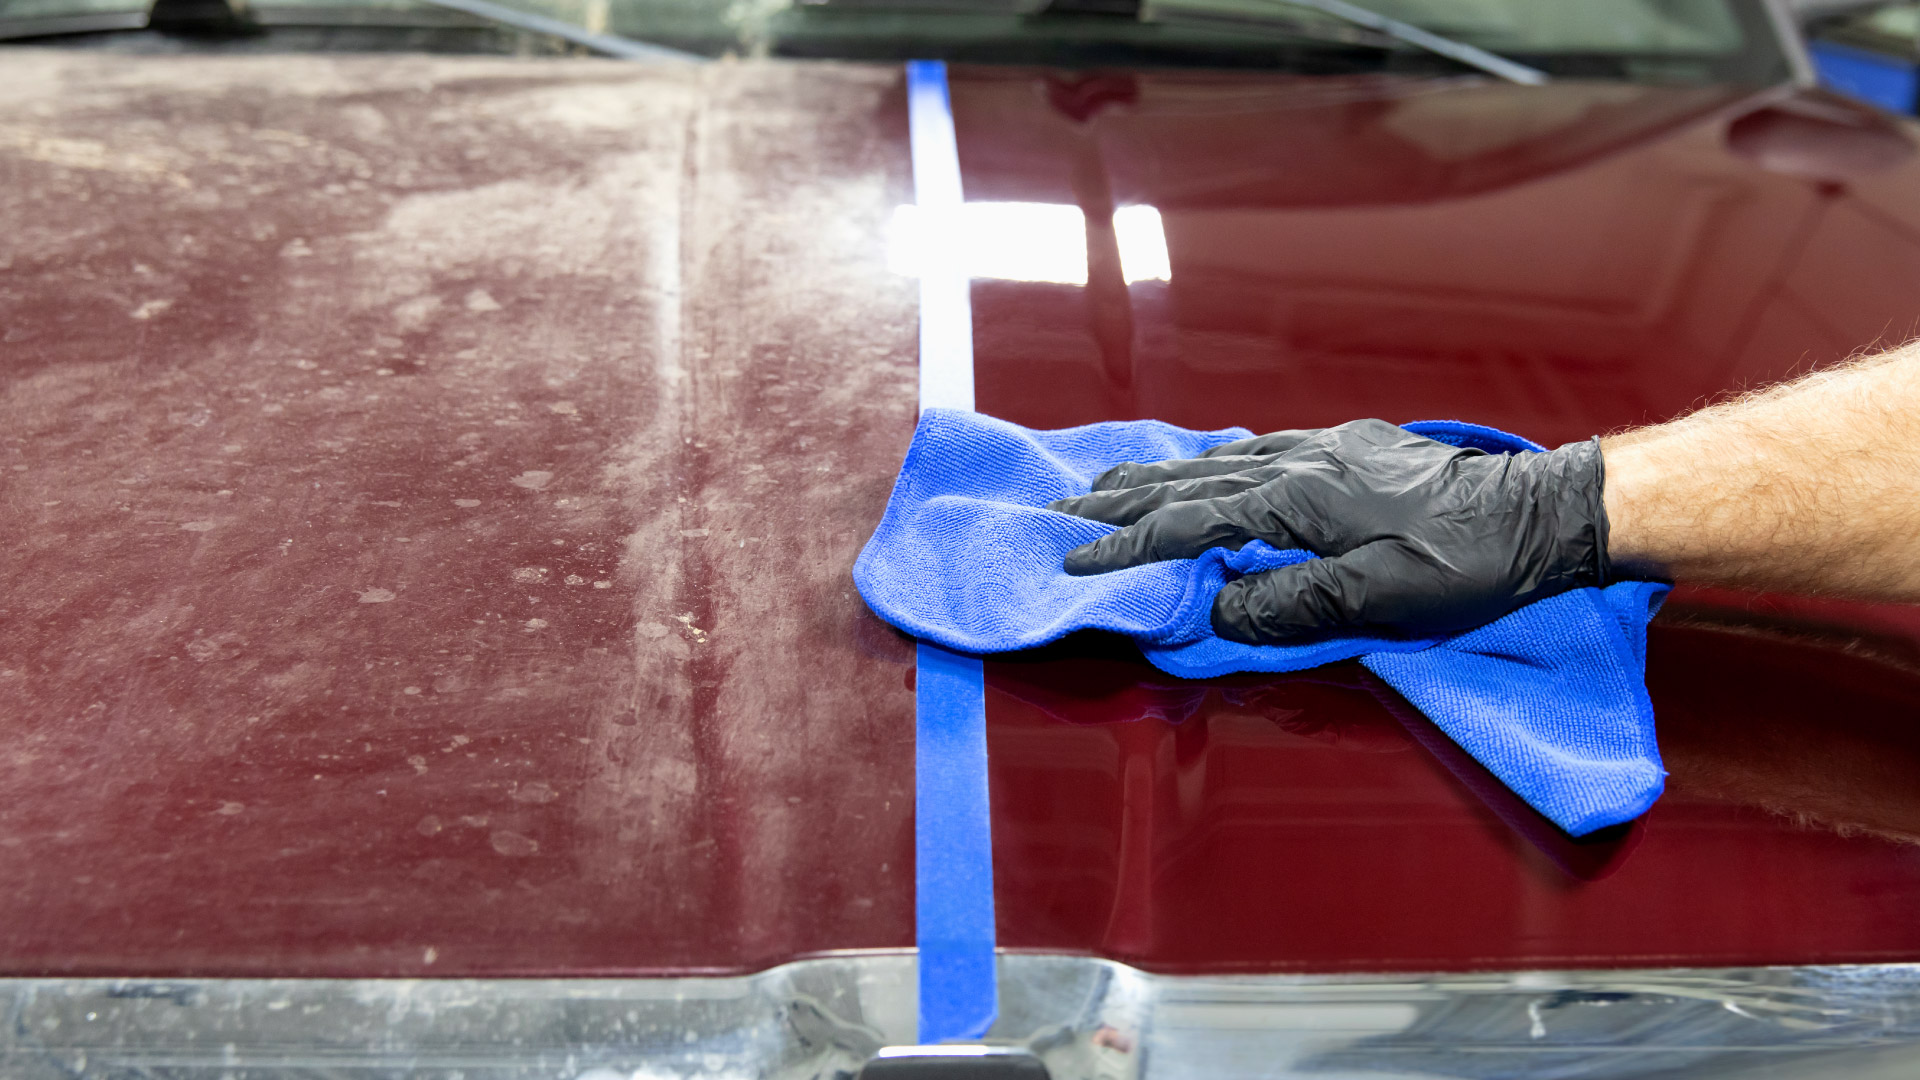
Using A Clay Bar
A clay bar removes bonded contaminants that washing cannot. Lubricate the surface with a clay lubricant or quick detailer. Gently glide the clay bar over the paint in straight lines. You will feel the surface become smooth as contaminants lift away.
Work on small sections, wiping each with a microfiber towel afterward. This step is crucial for a perfectly clean surface before correction begins.
Choosing A Shady Workspace
Always work in a shaded area or indoors. Direct sunlight heats the paint and polish quickly. This causes uneven polishing and can damage the paint. A cool, shaded space allows better control and prevents the products from drying too fast.
Good lighting is important too. It helps spot imperfections clearly during correction. Avoid dusty or windy places to keep the car clean during the process.
Assessing Paint Condition
Assessing paint condition is the first step in car paint correction. It helps identify the problems on the paint surface. Knowing the exact condition guides you in choosing the right tools and methods. This step prevents unnecessary damage and ensures better results.
Inspecting Surface Defects
Look closely at the paint under bright light. Check for scratches, swirl marks, oxidation, and water spots. Use your hand to feel for roughness or texture changes. Take note of deep scratches that may require special attention. This inspection sets the foundation for the correction process.
Performing Test Spots
Choose a small, hidden area to test your products. Apply a small amount of compound and polish with the pad. Observe how the paint reacts to the treatment. Check if the scratch or defect improves or worsens. Test spots save time and avoid damage on large areas.
Selecting Pads And Compounds
Match the pad type with the compound strength based on your inspection. Soft pads with light polish work for minor defects. Use medium or heavy cutting pads with stronger compounds for deep scratches. Using the right combination reduces paint removal and improves finish. Change pads often to keep them clean and effective.
Compounding Steps
Compounding is a key step in car paint correction. It removes surface defects and restores shine. This process uses abrasive compounds to smooth the paint. Proper compounding brings back the car’s original look.
Using A Dual Action Polisher
A dual action polisher is safe and effective for compounding. It moves in two directions to avoid paint damage. Use a foam or microfiber pad with the polisher. Work in small sections for better control. Start at low speed and increase if needed. Keep the polisher moving to prevent heat buildup.
Removing Deep Scratches
Deep scratches require more attention during compounding. Choose a cutting compound designed for heavy defects. Apply the compound evenly on the pad. Use moderate pressure and slow speed to cut through scratches. Check your progress often to avoid over-polishing. Repeat if needed but avoid removing too much paint.
Safe Application Techniques
Safety is important during compounding to protect paint and yourself. Wear gloves and eye protection to avoid irritation. Clean the surface before applying compound to remove dirt. Use light to moderate pressure and keep the polisher moving. Avoid stopping the polisher on one spot to prevent burns. Wipe off residue with a clean microfiber towel after compounding.
Polishing For Gloss
Polishing is a key step in car paint correction to bring out a deep gloss. It removes small scratches and swirls left by cutting compounds. Polishing smooths the surface further, enhancing the paint’s clarity and depth. This step prepares the paint for finishing touches that add a mirror-like shine.
Switching To Finishing Pads
After cutting with heavy pads, switch to soft finishing pads. These pads apply less pressure and refine the paint surface. Finishing pads help remove fine haze and polish marks. Use slow machine speed and light pressure for best results.
Eliminating Haze
Haze appears as a dull, cloudy layer on the paint after cutting. Polishing with fine compounds clears this haze. It enhances transparency and smoothness of the paint. Work in small sections with a microfiber cloth to check progress frequently.
Enhancing Shine
Final polishing boosts the paint’s gloss and depth. Use a quality polish designed for shine enhancement. Buff the surface evenly to avoid streaks or swirl marks. Finish with a clean microfiber towel to reveal a flawless, glossy finish.
Protecting The Finish
After correcting your car’s paint, protecting the finish keeps the shine longer. The surface is smooth but still vulnerable to damage. Applying a protective layer prevents dirt, water, and UV rays from harming the paint. This step is essential for lasting results and maintaining your car’s beauty.
Wax, Sealant, Or Ceramic Coating
Choose between wax, sealant, or ceramic coating to protect the paint. Wax is natural and gives a warm shine but lasts a few weeks. Sealants are synthetic and last longer, up to a few months. Ceramic coatings create a hard, durable layer that can last years. Each option offers different levels of protection and shine.
Application Tips
Apply the chosen product on a clean, dry surface. Use a soft applicator pad for wax or sealant. Spread evenly in small sections with gentle pressure. Let the product cure for the time stated on the label. Buff the surface with a microfiber cloth to remove residues. For ceramic coating, follow the instructions carefully and work in a dust-free area.
Maintaining The Corrected Paint
Wash the car regularly using a pH-neutral shampoo. Avoid harsh chemicals and abrasive sponges. Dry the car with a soft microfiber towel to prevent water spots. Reapply wax or sealant every 2–3 months for continued protection. Ceramic coatings need less frequent maintenance but still benefit from regular cleaning. Proper care keeps the paint smooth and glossy for years.
Tools And Supplies
Car paint correction requires the right tools and supplies for best results. These tools help remove scratches and swirl marks. They restore the shine and smoothness of your car’s paint. Choosing quality equipment makes the process easier and more effective. Below are key items needed for paint correction.
Choosing The Right Polisher
A polisher is the main tool for paint correction. Dual action polishers are safe and easy for beginners. They reduce the risk of damaging paint. Rotary polishers offer more power but need skill to use. Pick a polisher with adjustable speed settings. This helps control the polishing process better.
Pad And Compound Types
Polishing pads come in foam, microfiber, and wool varieties. Foam pads are most common and work well for most jobs. Microfiber pads are good for cutting deeper scratches. Wool pads remove heavy defects but may be harsh on paint. Compounds vary from heavy cutting to fine polishing. Use heavier compounds with aggressive pads first. Finish with finer compounds and softer pads for shine.
Essential Accessories
Microfiber towels are essential for wiping off polish residue. Use clean, soft towels to avoid new scratches. Spray bottles with water or quick detailer help keep pads clean. Masking tape protects trim and sensitive areas from polish. A good lighting source helps spot imperfections clearly. Gloves keep hands clean and avoid oils on paint. Have all accessories ready before starting work.

Credit: zappysautowashes.com
Common Mistakes To Avoid
Car paint correction can dramatically improve your vehicle’s look. Avoiding common mistakes ensures better results and saves time. Many beginners make simple errors that damage paint or waste effort. Recognizing these pitfalls helps you protect your car’s finish and get a smooth, glossy surface.
Overcutting Paint
Overcutting happens when too much paint is removed during polishing. It weakens the clear coat and exposes the base layer. This causes permanent damage and reduces paint protection. Always use the least aggressive polish needed for the job. Stop polishing once defects disappear to preserve your paint.
Ignoring Test Spots
Skipping test spots risks using the wrong polish or pad. Test spots show how the paint reacts and how much correction is needed. They help avoid wasting time and ruining the paint. Always try a small area first. Adjust your technique based on the test results before full correction.
Skipping Protection
Paint correction removes old layers and exposes paint to damage. Skipping protection after correction leaves the surface vulnerable to dirt and UV rays. Apply a good sealant or wax to lock in shine and shield the paint. Regular protection keeps your car looking fresh longer and reduces future correction needs.
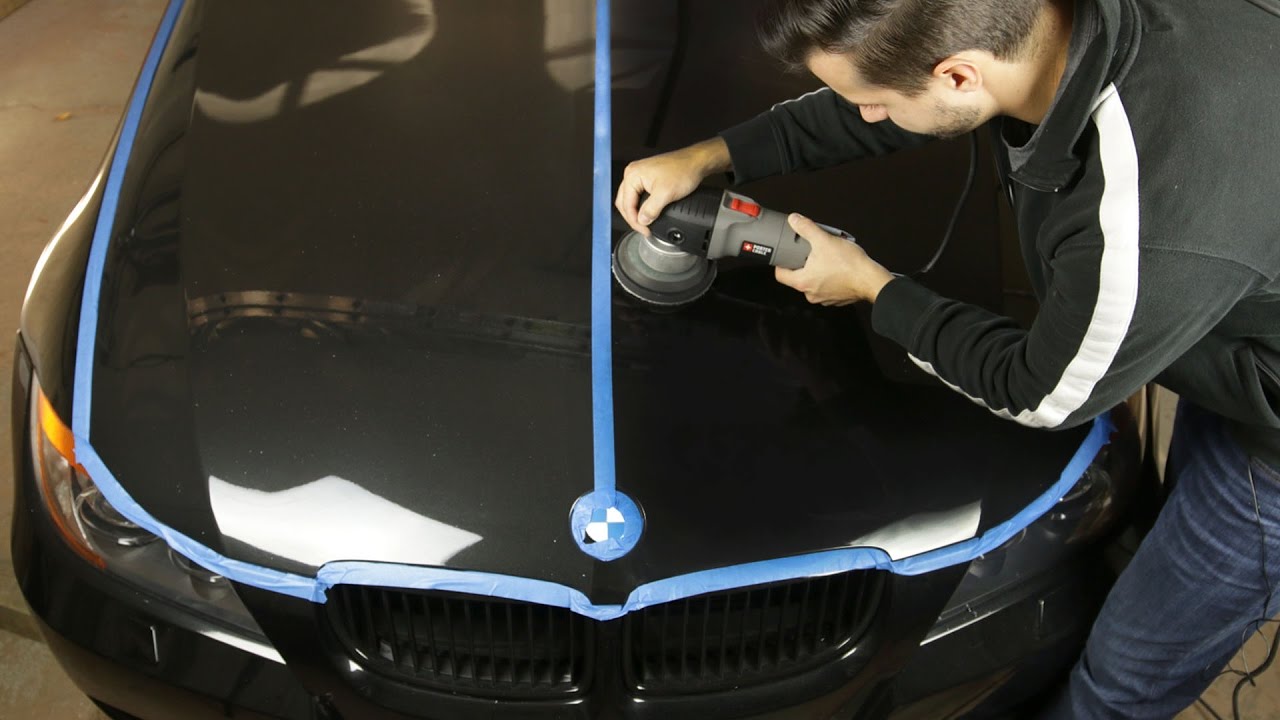
Credit: www.youtube.com
Frequently Asked Questions
How Is Paint Correction Done On A Car?
Paint correction cleans and smooths the car’s surface using a machine polisher, compounds, and microfiber pads. First, wash and decontaminate the paint. Next, test a small area to choose the right product. Then, compound to remove scratches and polish to enhance gloss.
Finish with protective coating.
How To Correct Paint On A Car?
Wash and clay bar the car to remove contaminants. Test a small area with a polishing compound. Use a machine polisher with the right pad and compound to remove scratches. Polish for gloss and apply a protective wax or sealant to finish.
How Much Does It Cost To Paint Correct Your Car?
Paint correction costs vary by level: one-step costs $500–$800, two-step $1,000–$1,500, and three-step $1,800–$2,500+. Time ranges from 4 to 12+ hours.
Is Paint Correction Just Cut And Polish?
Paint correction involves more than just cut and polish. It includes washing, decontamination, compounding, polishing, and protection to restore paint.
Conclusion
Car paint correction restores your vehicle’s shine and smoothness effectively. Use the right tools and work carefully for best results. Patience and proper technique help remove scratches and swirls. Regular maintenance keeps your car looking fresh and protected. Practice makes the process easier and more rewarding over time.
Try these steps to improve your car’s appearance today.