Want to make your wheels look brand new and protect them from brake dust, dirt, and harsh weather—all in just 30 minutes? You’re in the right place.
Ceramic coating your wheels not only gives them a lasting shine but also makes cleaning a breeze. In this step-by-step guide, you’ll learn how to ceramic coat your wheels quickly and effectively without any fuss. Follow along, and you’ll save time, effort, and money while giving your wheels the professional treatment they deserve.
Ready to transform your ride? Let’s get started!

Credit: www.youtube.com
Preparation
Preparation is key to ceramic coating your wheels quickly and effectively. Proper setup ensures the coating bonds well and lasts longer. Spend time on preparation to avoid mistakes during application.
Gather Tools And Materials
Collect all necessary items before you start. You will need ceramic coating, applicator pads, microfiber towels, wheel cleaner, and gloves. Having everything ready saves time and keeps the process smooth.
Choose The Right Ceramic Coating
Select a ceramic coating designed specifically for wheels. These coatings resist brake dust and road grime better. Pick a product with a quick curing time for faster results.
Set Up Your Workspace
Work in a shaded, dust-free area to prevent contamination. Make sure the surface temperature is moderate, between 60-80°F (15-27°C). Good lighting helps you see all spots clearly.
Cleaning Wheels
Ceramic coating your wheels starts with a clean surface. Dirt, brake dust, and other grime can stop the coating from bonding well. Cleaning wheels properly saves time later and gives a smooth finish. Follow these quick steps to prepare your wheels for ceramic coating.
Remove Loose Dirt And Brake Dust
Use a soft brush or cloth to remove loose dirt. This clears away surface dust and debris fast. Focus on all wheel areas, including tight spots. Removing loose dirt prevents scratches during deeper cleaning.
Apply Wheel Cleaner
Spray a wheel cleaner designed for your wheel type. Let it sit for a few minutes to break down grime. Use a brush to scrub areas with heavy brake dust. Rinse well with water to remove all cleaner residue.
Use Clay Bar For Contaminants
Rub a clay bar gently over the wheel surface. This removes stubborn contaminants that washing misses. Keep the wheel wet with a lubricant spray to avoid scratches. Clay bar cleaning ensures a smooth, clean surface for coating.
Dry Wheels Thoroughly
Use a clean microfiber towel to dry the wheels completely. No water spots or moisture should remain. Dry wheels help the ceramic coating bond better. Take time to check all wheel parts for dryness.
Surface Prep
Preparing your wheels is a key step before applying ceramic coating. The surface must be clean and smooth. This helps the coating stick well and last longer. Follow these simple steps for quick and effective surface prep.
Inspect For Damage
Look closely at your wheels for scratches, chips, or corrosion. Small damages can affect how the coating bonds. Fix any issues first to get the best results. Use good lighting and a magnifying glass if needed.
Polish To Remove Imperfections
Use a mild polish to smooth out scratches and swirl marks. Polishing makes the surface even and shiny. Apply polish with a soft cloth and buff in small circles. This step improves the wheel’s appearance and coating adhesion.
Degrease Wheel Surface
Clean off any grease, brake dust, or dirt with a degreaser. This ensures no oils block the coating from bonding. Spray the degreaser and wipe with a clean microfiber cloth. Repeat if the surface still feels oily.

Credit: www.youtube.com
Applying Ceramic Coating
Applying ceramic coating to your wheels is a critical step for long-lasting protection. It creates a strong shield against dirt, brake dust, and water. Proper application ensures the coating bonds well and lasts longer. Follow these steps carefully to get even coverage and a smooth finish fast.
Wrap Applicator With Microfiber Cloth
Start by wrapping your applicator pad with a clean microfiber cloth. This helps spread the coating evenly. The cloth also prevents wasting too much product. Make sure the cloth fits snugly around the applicator for better control.
Apply Coating In Thin Layers
Pour a small amount of ceramic coating onto the cloth-wrapped applicator. Apply the coating in thin, light layers. Avoid heavy or thick application to prevent streaks and uneven drying. Work quickly but carefully to cover all areas.
Cover Barrel And Face Evenly
Apply the coating evenly on both the barrel and face of the wheel. Use smooth, overlapping strokes to avoid missing spots. Ensure every inch gets covered for full protection. Pay attention to edges and hard-to-reach areas.
Curing Process
The curing process is a key step in ceramic coating your wheels. It helps the coating bond well to the surface. Proper curing ensures long-lasting protection and a glossy finish. Follow these simple steps to cure your ceramic coating fast and correctly.
Let Coating Sit Briefly
After applying the ceramic coating, allow it to sit for a few minutes. This time lets the coating begin to bond with the wheel surface. Avoid touching or wiping the coating during this stage. A brief wait ensures better adhesion and durability.
Remove Excess Coating
Use a clean microfiber cloth to gently wipe off any extra coating. Excess product can cause uneven spots or streaks. Wiping carefully helps create a smooth, even layer. Remove all residue to prevent buildup and ensure a flawless finish.
Speed Up Curing With Heat
Heat can speed up the curing process of your ceramic coating. Use a heat gun or place the wheels in a warm area. Keep the temperature steady but not too hot to avoid damage. Faster curing means you can finish your job in less time.

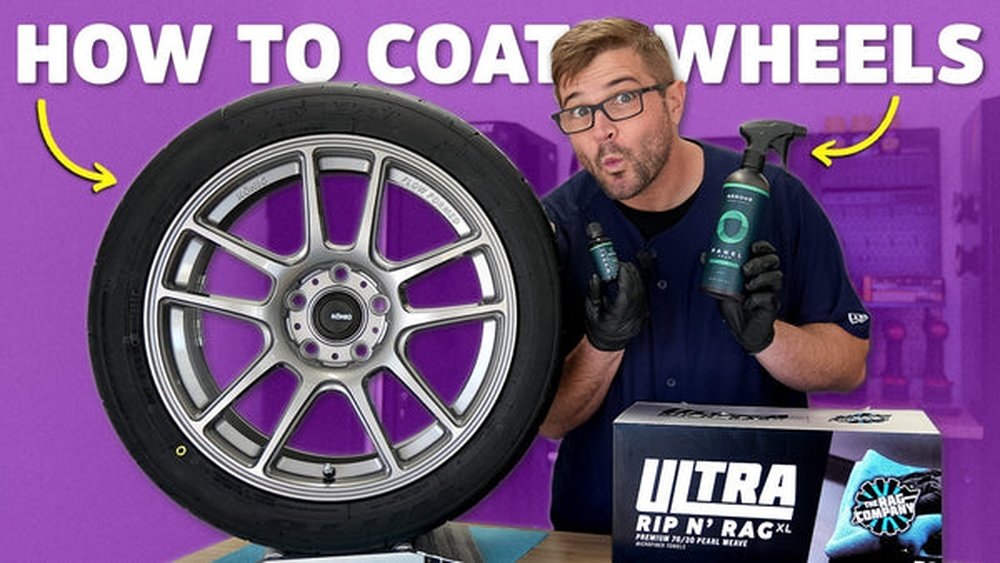
Credit: theragcompany.com
Final Touches
After applying ceramic coating on your wheels, the final touches make a big difference. These steps ensure a smooth, even finish and long-lasting protection. Take a few minutes to check your work carefully. This careful approach helps avoid any missed spots and ensures the coating cures properly.
Inspect For Missed Spots
Look closely at each wheel under good light. Check for areas where the coating might be thin or missing. Use a microfiber cloth to gently wipe any excess residue. Fix any missed spots right away for full coverage. This step prevents uneven protection and dull patches.
Apply Second Layer If Needed
If some areas seem thin or less shiny, apply a second layer. Use the same method as before, but keep it light. One more thin coat strengthens the protection and improves shine. Avoid heavy layers that can cause streaks or peeling.
Allow Full Cure Time
Let the coating cure fully for best results. The curing process can take several hours to days depending on the product. Avoid touching or washing the wheels during this time. Proper curing makes the coating hard and durable. It helps protect your wheels from dirt and brake dust for months.
Maintenance Tips
Maintaining your ceramic-coated wheels is key to keeping their shine and protection. Good care helps the coating last longer and keeps wheels looking new. Follow simple steps to protect your investment and enjoy the benefits daily.
Regular Cleaning Routine
Clean your wheels often with water and a soft cloth. Use a gentle wheel cleaner safe for ceramic coatings. Avoid letting brake dust and dirt build up. Quick washes prevent stains and keep the coating strong.
Avoid Harsh Chemicals
Stay away from acidic or abrasive cleaners. These can damage the ceramic layer and dull the finish. Choose pH-neutral cleaning products made for coated surfaces. Protect your wheels by using safe, mild cleaners only.
Reapply Coating Annually
Renew the ceramic coating every year for lasting protection. This keeps the wheels resistant to dirt and damage. Follow the product instructions for easy reapplication. A fresh layer restores shine and durability.
Conclusion
Ceramic coating your wheels can protect and shine them quickly. Follow each step carefully for best results. Use clean tools and work in a well-lit area. Avoid rushing to ensure even application and drying. Your wheels will look fresh and stay cleaner longer.
Regular maintenance will keep the coating strong and effective. This simple process saves time and effort in the long run. Try it yourself and enjoy the lasting shine and protection.