Is your 12V car socket not working, leaving you unable to charge your devices or power your accessories? Don’t worry—you can fix this yourself without spending a fortune at a mechanic.
Replacing a 12V car socket is easier than you might think, and with a few simple tools, you’ll have your socket up and running in no time. In this guide, you’ll learn clear, step-by-step instructions that anyone can follow. Ready to take control and get your car’s power outlet working again?
Let’s dive in and make it happen!
Safety Precautions
Safety is the top priority before replacing a 12V car socket. Handling electrical parts can be risky without proper precautions. Taking simple safety steps helps avoid shocks and damage. Follow these guidelines carefully to keep yourself and your vehicle safe.
Disconnect Battery Or Fuse
Start by disconnecting the car battery. This stops all power flow to the socket. If disconnecting the battery is hard, remove the fuse linked to the socket. This also cuts power and protects the circuit. Always use the car manual to find the right fuse. Without power, you avoid shorts or shocks during replacement.
Prepare Basic Tools
Gather simple tools before starting the work. Common tools include a screwdriver, pliers, and a trim removal tool. These help safely remove panels and the old socket. Avoid using sharp or large tools that can damage parts. Having the right tools ready makes the process smoother and safer.
Accessing The Socket
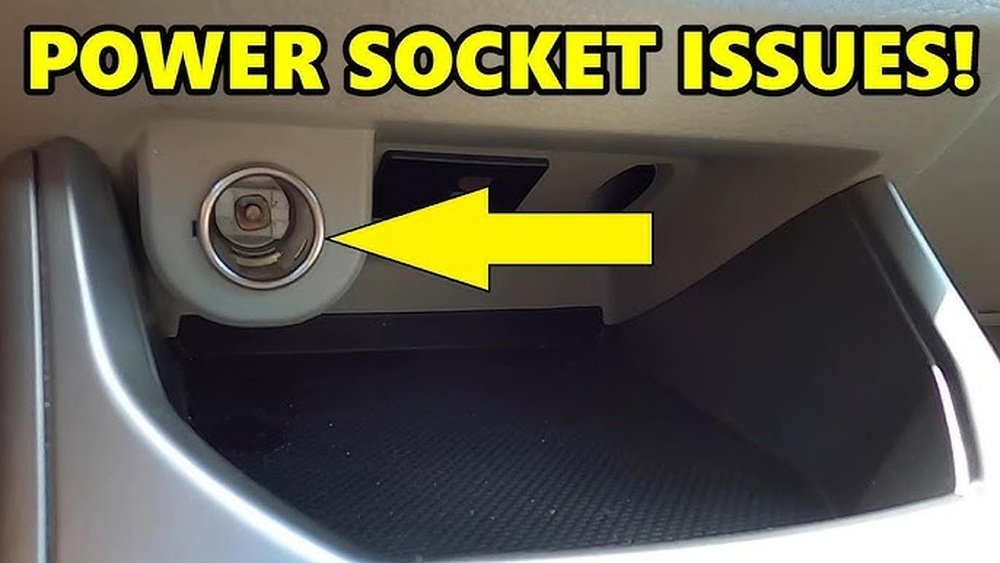
Accessing the 12V car socket is the first step in replacing it. The socket often sits behind trim panels or inside the center console. Removing these panels carefully gives you space to work. Proper access helps avoid damage to your vehicle’s interior.
Remove Trim Panels
Start by locating the trim panels around the socket. These panels usually clip into place and can be gently pulled off. Use your hands or a trim removal tool to avoid scratches. Take your time to release all clips evenly. Keep the panels safe for reinstallation later.
Use Pry Tools Carefully
Use plastic pry tools to loosen tight panels without harm. Insert the tool gently between the panel and dashboard. Work slowly around edges to release hidden clips. Avoid metal tools that can scratch or damage surfaces. Proper tool use protects both panels and your hands.
Removing The Old Socket
Removing the old 12V car socket is the first step in the replacement process. This task requires care to avoid damage to the wiring or dashboard. Follow simple steps to safely disconnect and remove the socket from your vehicle.
Disconnect Wiring Harness
Start by locating the wiring harness connected to the socket. Gently press the clip or tab securing the harness. Carefully pull the connector away from the socket. Do not pull on wires directly to avoid damage.
Release Retaining Clips
The socket is held in place by retaining clips. Identify these clips around the socket’s edge inside the panel. Press or squeeze the clips to release their grip. This action frees the socket for removal without breaking clips or surrounding trim.
Use Removal Tools Or Pliers
Use a removal tool or needle-nose pliers to push the socket out. Insert the tool behind the socket to reach the clips. Apply steady pressure to avoid bending or breaking the socket housing. Pull the socket forward once clips release.
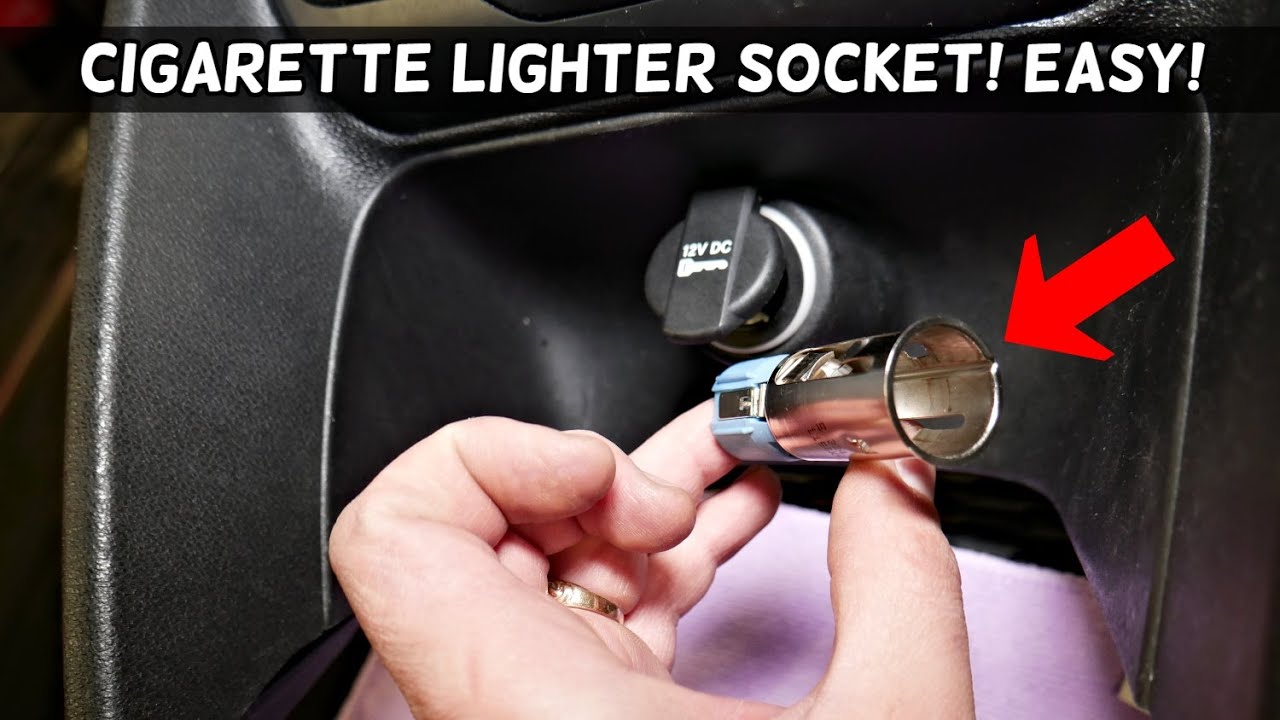
Credit: www.youtube.com
Installing The New Socket
Installing the new 12V car socket is a straightforward process that restores power to your device charger. Proper installation ensures the socket fits securely and works safely. Follow each step carefully for a solid, long-lasting connection.
Align And Secure Socket
First, check the new socket’s orientation. Match the grooves or tabs on the socket with the car’s panel slot. Gently push the socket into place until it fits snugly. Avoid forcing it; it should click or lock smoothly. This keeps the socket stable during driving and prevents damage.
Reconnect Wiring Harness
Next, reconnect the wiring harness to the socket’s terminals. Ensure each wire connects to the correct terminal for power and ground. Push the connector firmly until it clicks or feels secure. Loose connections can cause power issues or short circuits. After connecting, test the socket by turning on the car and plugging in a device.
Reassembling And Testing
After installing the new 12V car socket, the next step is reassembling and testing. This ensures your socket works safely and fits well. Take your time to put everything back in place carefully. Proper reassembly prevents loose parts and electrical issues. Testing confirms the socket supplies power correctly. Follow these simple steps for a smooth finish.
Reinstall Trim Panels
Start by placing the trim panels back in their original positions. Align the clips and edges carefully to avoid damage. Press the panels gently but firmly until they snap into place. Use any screws or fasteners you removed earlier to secure the panels. Check that no gaps or loose parts remain. This step restores the car’s interior look and protects wiring.
Restore Power
Reconnect the car battery or reinsert the fuse to restore power. Make sure the ignition is off before doing this. Double-check all connections to avoid short circuits. Once power is back, the socket should be ready for testing. This step is important for safety and proper function.
Test Socket Functionality
Test the socket by plugging in a device like a phone charger or GPS. The device should power on or start charging immediately. If it does not, check your connections again. Use a multimeter to verify voltage if needed. Ensure the socket is stable and does not wiggle. Testing guarantees your new 12V socket works perfectly.

Credit: www.amazon.com
Upgrading Options
Upgrading your 12V car socket offers more than just a simple replacement. Modern options improve convenience and functionality. These upgrades let you charge devices faster and handle multiple gadgets at once. Choosing the right upgrade depends on your needs and budget.
Consider adding USB chargers or multiple ports. Both options give more flexibility than a standard socket. They fit easily into the space of the old socket. Installation is straightforward with basic tools and some care.
Install Usb Charger
Installing a USB charger replaces the old socket with a modern charging port. USB ports fit most devices like phones, tablets, and GPS units. They provide faster charging than traditional 12V sockets. Some chargers include features like quick charge or voltage display. This upgrade removes the need for bulky adapters. It also frees up space in your car’s interior.
Add Multiple Ports
Adding multiple ports expands your car’s charging capacity. You can charge two or more devices at once. This is perfect for families or group trips. Multiple ports come in different styles and sizes. Some combine USB and 12V sockets for versatility. Installation is similar to replacing a single socket. It gives more convenience without extra wiring complexity.
Troubleshooting Tips
Troubleshooting your 12V car socket before replacement saves time and effort. It helps find simple issues causing the socket to fail. Follow these tips to spot common problems quickly. These checks often fix the socket without full replacement.
Check And Replace Fuse
The fuse protects your car socket from electrical damage. Locate the fuse box, usually under the dashboard or hood. Find the fuse for the 12V socket using the car manual. Check if the fuse is blown by looking for a broken wire inside. Replace the fuse with one of the same rating. Test the socket again after replacing the fuse.
Clean Corroded Contacts
Corrosion blocks electrical flow in the socket contacts. Remove the socket cover and inspect the metal contacts inside. Use fine sandpaper or a wire brush to clean any rust or corrosion. Wipe with a dry cloth to remove debris. Reinstall the socket and test if the power returns. Clean contacts improve connection and performance.
Inspect For Physical Damage
Look closely at the socket for cracks, burns, or loose parts. Damage may prevent the socket from working safely. Check the wiring harness for frayed or disconnected wires. Replace the socket if it shows visible damage. Secure or replace damaged wires to restore proper function. Physical damage often causes socket failure.

Credit: www.amazon.com
Conclusion
Replacing a 12V car socket is simple and saves money. Always disconnect the car battery before starting work. Use basic tools to remove the old socket carefully. Installing the new socket only takes a few minutes. Testing the socket ensures it works correctly.
Upgrading to a USB port adds convenience. This task suits beginners with patience and care. Regular checks keep your car’s power outlet reliable. A working socket keeps devices charged on the go. Try this easy fix to keep your car powered.