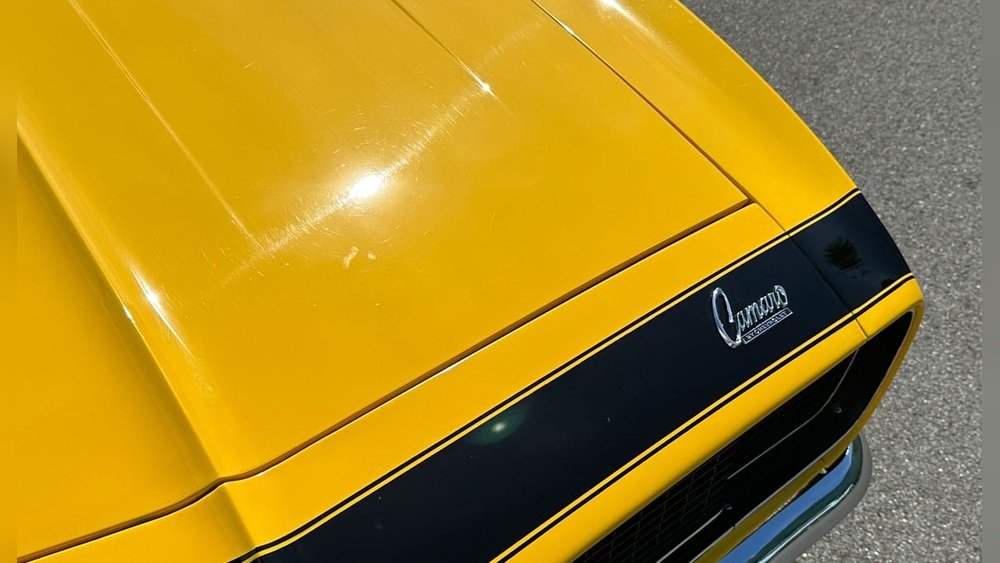
You want to capture every swirl, scratch, and etching on your car’s paint with clear, detailed photos. But how do you make sure your pictures reveal the true condition without missing any flaws?
Getting this right is crucial whether you’re documenting damage for insurance, selling your car, or planning a paint correction. In this guide, you’ll learn simple, effective techniques to photograph those subtle imperfections so they stand out exactly as they do in real life.
Follow along and discover how to take sharp, well-lit images that show every detail of your car’s paint surface—making your next step easier and more confident.
Preparing The Car Surface
Preparing the car surface is essential before capturing clear photos of swirls, scratches, and etching in car paint. A clean and smooth surface reveals imperfections better. Dirt and grime can hide or distort these flaws. Proper preparation helps your camera capture every detail sharply and accurately.
Thorough Washing Techniques
Start by washing the car with a pH-balanced car soap. Use a soft microfiber mitt to avoid adding new scratches. Rinse the car thoroughly to remove loose dirt and debris. Avoid harsh detergents that can harm the paint. Wash in shaded areas to prevent soap from drying too fast. This basic cleaning removes surface dirt that could blur the photo.
Using A Clay Bar For Contaminant Removal
After washing, use a clay bar to remove embedded contaminants. Lubricate the paint with a clay lubricant or quick detailer spray. Gently glide the clay bar over the lubricated paint. This process lifts invisible particles that washing alone cannot remove. Clean each section with a microfiber towel after claying. A smooth surface improves light reflection and highlights scratches clearly.
Drying And Inspection
Dry the car using a clean microfiber towel to avoid water spots. Pat the surface instead of rubbing to prevent new scratches. Inspect the paint under good lighting conditions. Look for swirls, scratches, and etching that might show after cleaning. Make sure the surface is spotless and smooth for the best photo results.
Selecting The Right Equipment
Selecting the right equipment is key to capturing clear images of swirls, scratches, and etching on car paint. The right tools highlight every detail without distortion or glare. Proper equipment ensures that the damage is visible and easy to analyze. This helps in documenting the condition accurately for repair or sale purposes.
Choosing The Camera And Lens
A camera with manual settings works best for this type of photography. DSLRs or mirrorless cameras allow control over focus and exposure. A macro lens captures fine details of scratches and swirls. Lenses with focal lengths between 50mm and 100mm are ideal. Avoid wide-angle lenses, as they can distort the paint surface.
Lighting Tools And Setup
Good lighting reveals imperfections on the car’s paint. Use soft, diffused light to reduce harsh reflections. LED panels or ring lights provide consistent illumination. Position the lights at an angle to create shadows that emphasize scratches. Natural sunlight during early morning or late afternoon also works well.
Tripod And Stabilization
A sturdy tripod keeps the camera steady during close-up shots. This avoids blur caused by hand movement. Use a remote shutter release or timer to reduce vibration. Stabilization is especially important for low light or slow shutter speeds. A stable setup ensures sharp and clear images every time.
Camera Settings For Clear Images
Capturing clear images of swirls, scratches, and etching on car paint requires proper camera settings. Correct settings help show details sharply and accurately. This section explains how to adjust your camera for the best results.
Using the right aperture, shutter speed, ISO, and focus mode is essential. These settings control light, clarity, and depth, making the damage visible in photos.
Optimal Aperture And Shutter Speed
Set the aperture between f/8 and f/11 for sharp images. This range provides enough depth to keep scratches in focus. Use a shutter speed of 1/125 or faster to avoid blur. A faster shutter speed helps if you shoot handheld or outdoors.
Iso Considerations
Keep ISO low, around 100 to 400, to reduce noise. Low ISO keeps images clean and detailed. Increase ISO only if light is very low and you cannot use a tripod. Noise can hide fine scratches and swirl marks.
Focus Modes And Depth Of Field
Use single-point autofocus to target the damaged area. This mode ensures the camera focuses exactly where you want. Select a narrow depth of field to blur the background and highlight the swirls. Manual focus also works well for close-up shots.
Techniques To Capture Swirls And Scratches
Capturing swirls, scratches, and etching in car paint requires specific techniques. These help reveal fine imperfections clearly in photos. Proper lighting, camera distance, and focus are key elements. Understanding these methods ensures your images highlight all details accurately. This section explores techniques to capture swirls and scratches effectively.
Using Reflective Light Angles
Light reflection plays a big role in showing paint defects. Position the light source at a low angle to the car’s surface. This angle makes swirls and scratches stand out as bright or dark lines. Avoid direct overhead lighting, which can hide these details. Move around the car to find the best reflection angle. Use natural sunlight or a soft flashlight for clearer results.
Close-up Shots Vs Wider Context
Take close-up shots to capture fine details of swirls and scratches. Keep the camera steady and focus sharply on the damaged area. Use a macro lens or the macro mode on your camera. Then, take wider shots to show the location of the damage on the car. These two views together give a full picture of the issue. Always maintain good lighting for both shot types.
Highlighting Etching And Fine Details
Etching can be very subtle and hard to see in photos. Use soft, angled light to enhance these fine marks. Adjust the camera’s exposure to avoid glare or dark spots. Experiment with different backgrounds to avoid distractions. A plain, dark background often works best. Use a tripod to keep your camera stable for sharp images. Take multiple shots to capture the best detail.
Using Natural And Artificial Light
Capturing swirls, scratches, and etching in car paint requires careful lighting. The right light reveals the flaws without hiding details. Both natural and artificial light play key roles in highlighting imperfections. Knowing how to use them improves photo clarity and detail. Experimenting with different lighting conditions helps find the best setup for your shots.
Shooting In Shade Vs Direct Sunlight
Shooting in shade softens light and reduces harsh reflections. It helps show swirls and scratches clearly without glare. Direct sunlight creates strong shadows and bright spots. This can hide small defects or make them hard to see. Shade offers even light, making it easier to capture subtle paint damage. Choose a shaded spot for balanced lighting on the car surface.
Employing Led Or Flash Lighting
LED or flash lights add controlled illumination to your photos. They help highlight scratches by casting sharp light at an angle. Use a small, portable LED or a camera flash with diffuser. This lighting creates contrast, making defects stand out. Position lights to avoid washing out details or creating bright spots. Artificial lighting works well indoors or on cloudy days.
Avoiding Glare And Reflections
Glare and reflections can hide swirls and scratches in photos. Change your shooting angle to reduce shiny spots on the paint. Use a polarizing filter on your camera lens to cut glare. Keep the light source low and to the side for better texture visibility. Avoid direct light facing the lens, which causes reflections. Controlling glare makes scratches more visible and the photo clearer.
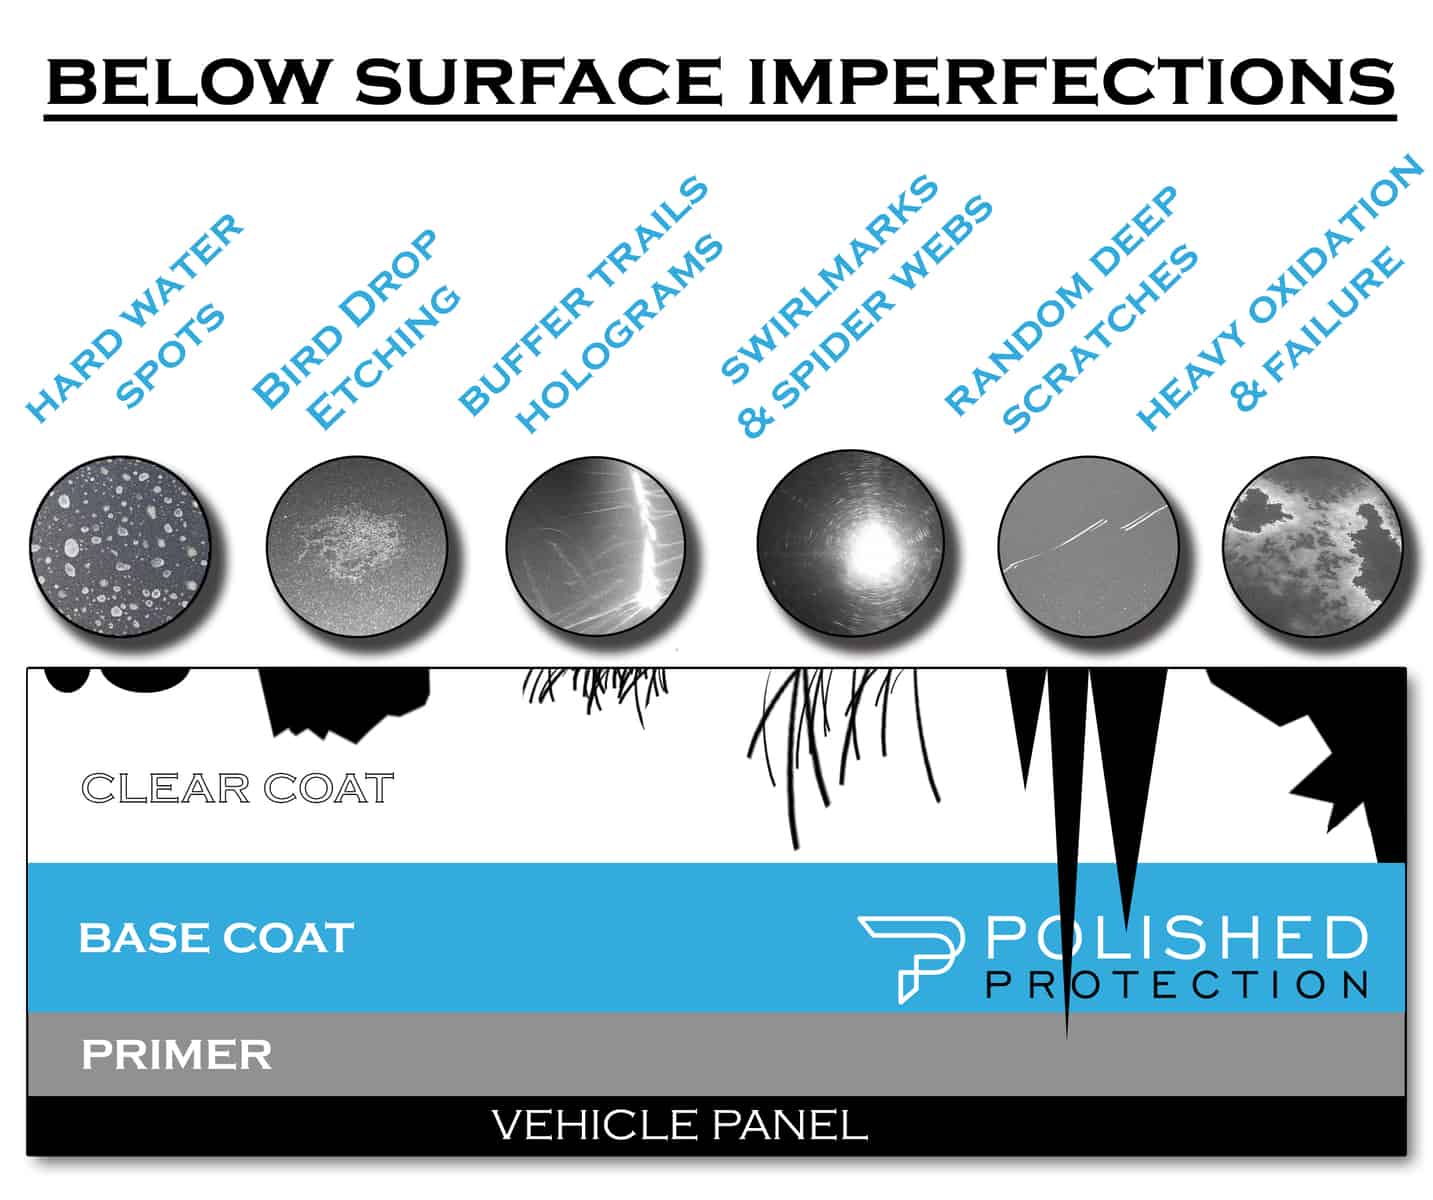
Credit: www.polishedprotection.com
Post-processing Tips
Post-processing plays a key role in capturing the true details of swirls, scratches, and etching on car paint. Editing your photos carefully can highlight these imperfections clearly. It helps bring out texture and depth that might be hard to see in the raw image. Use post-processing to make your photos informative and visually appealing.
Enhancing Contrast And Sharpness
Increase contrast gently to make swirls and scratches stand out. Boosting contrast defines edges and brings out subtle paint damage. Sharpen your image slightly to improve details without creating noise. Use tools like clarity or structure sliders carefully to highlight texture. Avoid making the image too harsh, which can distract from the real damage.
Avoiding Over-editing
Keep your edits natural and realistic. Too much editing can hide the actual paint issues or create false details. Maintain the original look of the car’s surface to show true condition. Resist heavy filters or extreme adjustments that may confuse viewers. The goal is to show clear, honest photos of the paint defects.
File Formats And Resolution
Save your photos in high resolution to keep fine details sharp. Use lossless file formats like TIFF or PNG for best quality. JPEGs are okay but avoid high compression to reduce quality loss. High resolution files let viewers zoom in on the swirls and scratches. Proper file format and size help maintain clarity on different devices.
Documenting Damage For Reports
Documenting damage on car paint is essential for accurate reports. Clear photos help show the exact condition. Good documentation supports insurance claims and repair estimates. Taking detailed pictures requires attention to angles, scale, and organization.
Capturing Multiple Angles
Take photos from different angles to show the damage clearly. Capture close-up shots to highlight swirls and scratches. Also, shoot wider shots to show the damage location on the car. Change lighting slightly to reveal etching or subtle marks. This variety helps experts understand the full extent of damage.
Including Scale References
Place a ruler or coin next to the damage for size reference. This shows the exact length and width of scratches or swirls. Without scale, damage size can be misleading. Use objects that are easy to recognize and standard in size. Scale references add trust and accuracy to your report.
Organizing Photos Effectively
Sort photos by damage type or car section for easy review. Label images with dates and descriptions to avoid confusion. Use folders or albums to keep files neat and accessible. A clear photo organization saves time during claim or repair processes. Well-organized photos make damage assessment smoother and faster.
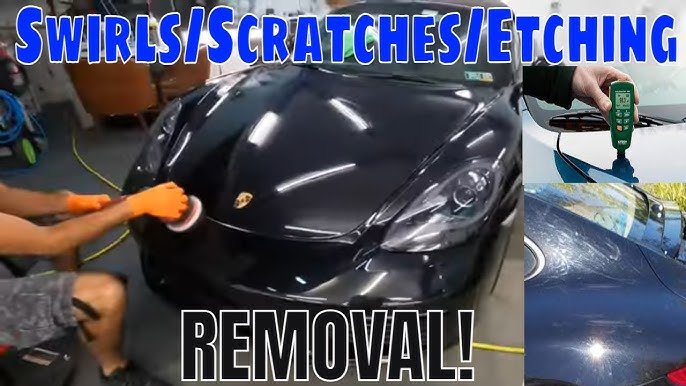
Credit: www.youtube.com
Common Mistakes To Avoid
Taking clear and detailed pictures of swirls, scratches, and etching on car paint requires careful attention. Avoiding common mistakes can save time and improve the quality of your photos. These mistakes often reduce the visibility of damage and make the pictures less useful for assessment or repair.
Blurry Or Out-of-focus Shots
Blurry photos hide the fine details of paint damage. Use a steady hand or a tripod to keep the camera still. Focus carefully on the area with scratches or swirls. Avoid zooming in too much, which can reduce image quality. Take multiple shots to ensure at least one is sharp and clear.
Poor Lighting Conditions
Lighting affects how well scratches and swirls show in photos. Avoid harsh direct sunlight that causes glare and reflections. Soft, diffused light is best for highlighting surface damage. Try shooting in the early morning or late afternoon. Using a flashlight at an angle can reveal subtle defects clearly.
Neglecting Surface Preparation
Dirty or dusty surfaces make damage hard to see. Wash and dry the car before photographing. Remove dust with a microfiber cloth to avoid smudges. Clean paint reflects light better, making defects stand out. Skipping this step leads to unclear images and missed details.
Expert Tips For Consistent Results
Capturing clear and detailed pictures of swirls, scratches, and etching in car paint requires more than just a good camera. Consistent results come from careful preparation and technique. The following expert tips focus on maintaining your equipment, practicing various methods, and using the right tools to enhance image quality.
Regular Camera Maintenance
Clean your camera lens before every shoot. Dust and smudges blur fine details like scratches and swirls. Check your camera sensor for dirt spots that can show up in images. Regularly update your camera firmware to improve performance. Store your camera in a dry, dust-free place to avoid damage.
Practicing Different Techniques
Try shooting from various angles to reveal surface imperfections. Use close-up shots to capture fine scratches clearly. Adjust your camera’s focus manually to highlight texture. Experiment with lighting direction to emphasize swirls and etching. Take multiple shots with different exposures to find the best detail.
Using Polarizing Filters
Attach a polarizing filter to reduce reflections on shiny paint surfaces. This filter helps show swirls and scratches without glare. Rotate the filter until you see the imperfections clearly. Polarizers also improve color saturation and contrast. They are essential for consistent and sharp car paint photos.

Credit: www.polishedprotection.com
Frequently Asked Questions
How To Take Photos Of Car Scratches?
Take one close-up photo within one foot to capture scratch details. Then, shoot another from three to four feet to show scratch location on the car. Use natural light and avoid shadows for clear images. Keep the camera steady to ensure sharp focus on the damaged area.
How To Take Swirl Marks Out Of Car Paint?
Wash and clay bar the car to remove contaminants. Use a compound or polish with a dual-action polisher in small sections. Buff with a microfiber towel. Finish by applying wax or sealant to protect the paint and enhance shine.
How To Get Rid Of Holograms In Car Paint?
Wash and clay bar your car to remove contaminants. Use a dual-action polisher with polish or compound. Work in small sections with overlapping passes. Buff with a clean microfiber towel. Finish by applying wax or sealant to protect the paint and prevent holograms.
How To See Swirls In Paint?
To see swirls in paint, use a bright light at a low angle. Inspect the surface closely for circular scratches.
Conclusion
Capturing clear photos of swirls, scratches, and etching helps show the true condition. Use good lighting and steady your camera for sharp images. Take close-up shots to reveal detail and wider shots to show location. Clean the car surface before shooting to avoid distractions.
These simple steps make documenting damage easier for repair or insurance purposes. Practice often to improve your photo skills and catch every flaw clearly.