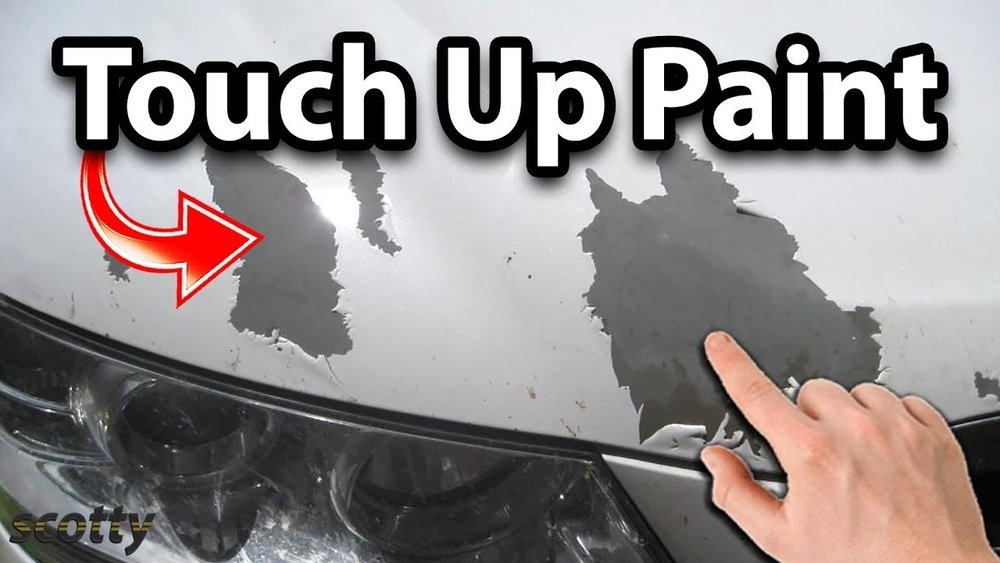
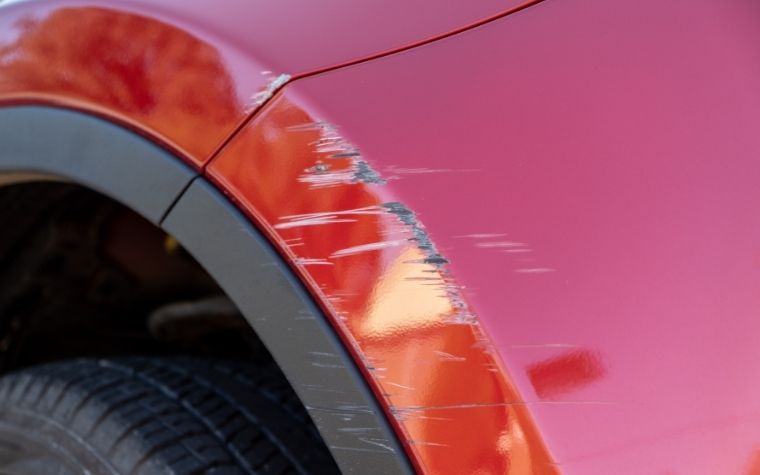
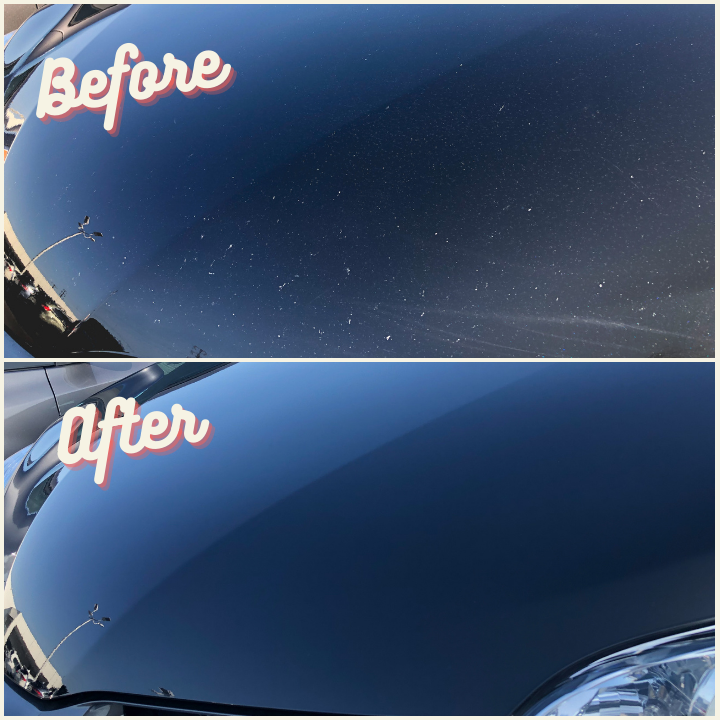
Have you noticed those tiny chips or scratches on your car’s paint and wondered if you could fix them yourself? You’re not alone.
Touching up car paint might seem tricky, but with the right steps, you can restore your car’s look without spending a fortune. Imagine being able to handle minor paint damage quickly and confidently, keeping your car looking fresh and protected.
In this guide, you’ll discover simple, clear instructions on how to touch up your car’s paint like a pro. Whether it’s a small chip or a scratch, you’ll learn how to make repairs that blend in seamlessly, so your car looks as good as new. Keep reading, and you’ll find out how easy it is to bring back that flawless finish to your ride.
Gathering Materials
Gathering the right materials is the first step to a successful car paint touch-up. Having everything ready avoids interruptions and ensures smooth work. This section guides you through choosing the correct paint and collecting essential tools.
Choosing The Right Paint
Select paint that matches your car’s original color exactly. Check your car’s color code, usually found on the driver’s side door or under the hood. Use this code to order touch-up paint from the dealer or trusted online stores. Avoid generic paints; they often do not match well and may look uneven after drying. Opt for small bottles or pens designed for touch-ups. These allow precise application and reduce waste.
Essential Tools And Supplies
Gather tools that make the job easier and cleaner. You need fine paint brushes or touch-up paint pens for small areas. Sandpaper with fine grit helps smooth rough spots before painting. Use rubbing alcohol or a prep cleaner to remove dirt and oils from the surface. Keep clean cloths or microfiber towels ready for wiping and drying. Masking tape can protect areas around the chip from accidental paint. A clear coat pen or spray helps seal and protect the new paint once dry.
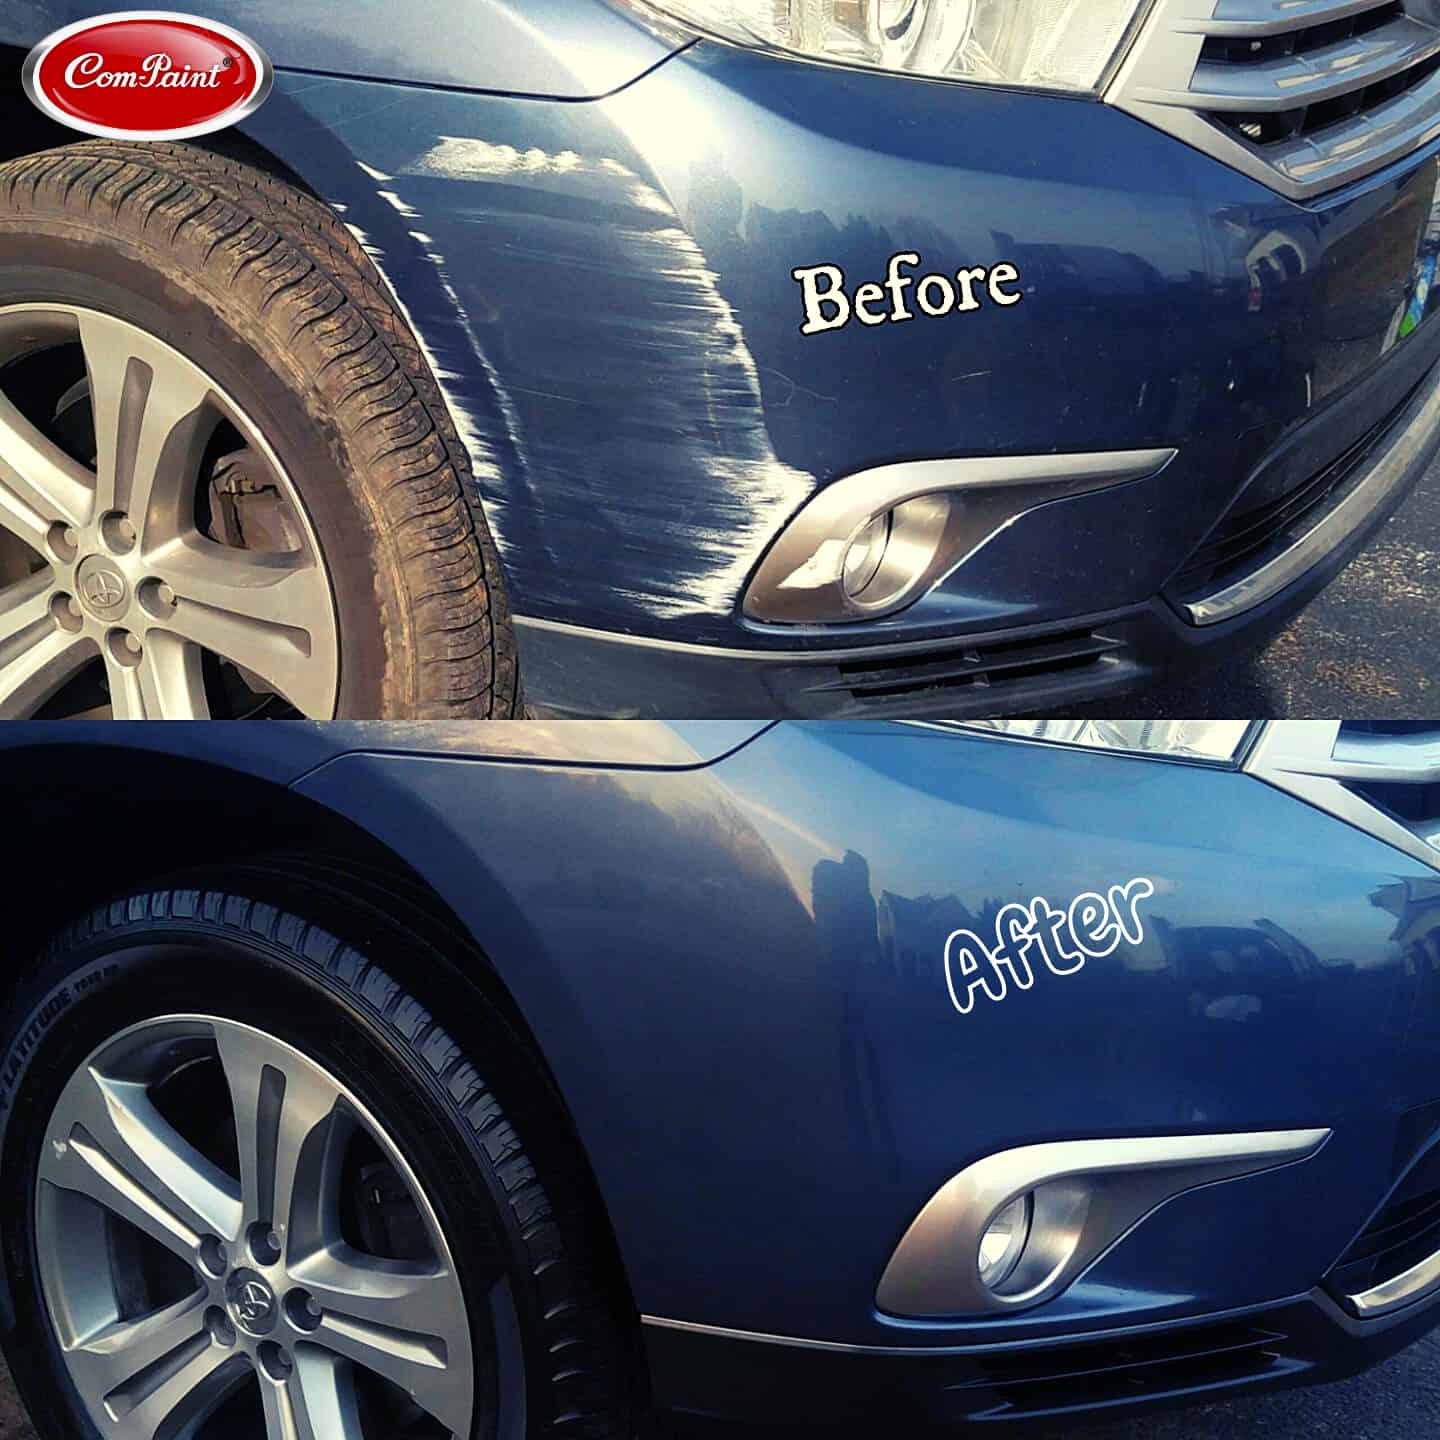
Credit: touchupdirect.com
Preparing The Surface
Preparing the surface is the first step for a smooth paint touch-up on your car. This process ensures the new paint sticks well and looks natural. Skipping this step can cause peeling or uneven finish later. Take your time to clean and smooth the area thoroughly before applying any paint.
Cleaning And Drying
Begin by washing the damaged area with soap and water. Remove all dirt, grease, and wax. Use a microfiber cloth to avoid scratching the paint. After washing, dry the surface completely. Moisture can prevent paint from adhering properly. For best results, use rubbing alcohol to wipe the area. This step removes any leftover oils or residues.
Sanding And Smoothing
Lightly sand the damaged spot using fine-grit sandpaper, around 600 to 800 grit. Sanding removes loose paint and rough edges. Be gentle to avoid damaging the surrounding paint. Smooth out any rust or corrosion if present. After sanding, clean the area again to remove dust. A smooth surface helps the touch-up paint blend better with the original paint.
Applying Primer
Applying primer is an important step in touching up car paint. It helps the new paint stick well and protects the metal. Without primer, the paint may peel or fade quickly. Primer also smooths out the surface for a better finish. This step ensures your touch-up work lasts longer and looks cleaner.
When To Use Primer
Use primer when the metal or bare surface shows after sanding. It covers scratches and rust spots. Primer is needed for deep chips or exposed metal areas. If you only have small paint scratches, primer is not necessary. Always check if the old paint is fully removed in the damaged area before applying primer.
Proper Primer Application
Start by cleaning the area with soap and water. Let it dry completely. Lightly sand the damaged spot to create a smooth surface. Shake the primer can well before use. Apply thin, even coats of primer. Wait a few minutes between each coat. Avoid thick layers to prevent drips and runs. Let the primer dry fully before painting. Use fine sandpaper to smooth the primer if needed. Wipe off dust before adding the touch-up paint.
Credit: www.com-paint.com
Painting Techniques
Painting techniques play a vital role in touching up car paint effectively. Using the right methods ensures the repair blends seamlessly with the original finish. This section covers key techniques to help you achieve a smooth, professional look.
Using A Brush Or Pen
Choose a fine brush or a touch-up pen for small chips and scratches. A brush offers control for larger areas, while a pen suits tiny spots. Dip lightly into the paint to avoid excess. Apply gently to fill the damaged area without spilling over. Let the paint settle before applying more if needed.
Feathering Edges
Feathering means blending the new paint into the old. Use light, outward strokes from the center of the repair. This softens the border and hides sharp lines. Avoid thick layers near edges. Feathering helps the touched-up spot look natural and smooth.
Layering Thin Coats
Apply paint in several thin layers instead of one thick coat. Thin coats dry faster and reduce drips or bubbles. Wait for each layer to dry before adding the next. This builds up color gradually and matches the original paint better. Patience with thin layers improves the final result.
Matching Texture And Finish
Matching the texture and finish of your car’s paint is vital for a seamless touch-up. The goal is to make the repaired spot blend naturally with the surrounding area. Texture and finish differences make touch-ups noticeable and reduce the car’s value. Focus on replicating the original paint’s look to keep your car looking its best.
Paying attention to the paint’s texture and gloss ensures the touch-up does not stand out. Proper technique and tools help create a smooth, even surface that matches the rest of the car. This step requires patience and care but greatly improves the final result.
Mimicking Original Paint Texture
Start by studying the car’s original paint texture closely. Car paint may have a smooth, matte, or slightly rough finish. Use the same application tool as the original paint, such as a brush or spray. Apply paint in thin layers to build up the texture gradually. Lightly dab the paint with a sponge or brush to match any patterns or grains. Avoid heavy strokes that create an uneven surface. Let each layer dry before adding the next to prevent clumping. This approach helps replicate the factory finish more accurately.
Avoiding Shiny Spots
Shiny spots appear when touch-up paint reflects light differently. Use a small amount of paint and spread it evenly. Feather the edges by blending the paint outward with soft, light strokes. This technique reduces visible lines between old and new paint. Avoid applying too much paint in one area. Once dry, gently buff the spot with fine polishing compound to blend gloss levels. Use a clear coat sparingly and only if needed to match the original shine. Taking time to control shine creates a natural, smooth finish.
Drying And Curing
Drying and curing are key steps after applying touch-up paint on a car. Proper drying ensures the paint sets well and bonds to the surface. Curing strengthens the paint, making it durable and resistant to damage. Skipping or rushing these steps can ruin your repair and cause peeling or fading. Follow the right methods to get a smooth, lasting finish.
Optimal Drying Conditions
Keep the car in a clean, dust-free area while the paint dries. Room temperature between 65°F and 75°F works best. Avoid high humidity as it slows drying and causes bubbles. Good air circulation helps evaporate solvents in the paint. Do not touch or apply any pressure on the wet paint. Let it dry for at least 24 hours before handling or adding a clear coat.
Using Uv Light For Curing
UV light speeds up the curing process of some touch-up paints. This method is common with special UV-curable paints. Place a UV lamp close to the painted area for about 5 to 10 minutes. The light hardens the paint faster than air drying. It also improves scratch resistance and gloss. Always follow paint maker instructions for UV curing to avoid damage. UV curing works best in controlled environments without direct sunlight interference.
Polishing And Blending
Polishing and blending are key steps to achieve a smooth and seamless car paint touch-up. These techniques help remove imperfections and blend the new paint with the old finish. Proper polishing and blending restore the shine and uniform color of your car’s surface.
These steps require patience and a gentle hand. Small mistakes can create visible marks or uneven surfaces. Follow the right methods to keep your car looking polished and natural.
Wet Sanding Techniques
Wet sanding smooths out rough spots and paint edges. Use very fine sandpaper, usually 1500 to 3000 grit, soaked in water. Keep the surface wet to avoid scratches.
Gently sand the area with light pressure in circular motions. Focus on blending the new paint with the surrounding area. Wipe clean often to check your progress.
Do not over-sand; stop as soon as the surface feels even and smooth. This step prepares the paint for buffing and polishing.
Buffing For A Flawless Look
Buffing removes sanding marks and brings out a glossy finish. Use a soft foam pad and a polishing compound made for automotive paint. Apply a small amount to the pad.
Work in small sections with a buffer or by hand. Move the buffer in slow, overlapping circles. Keep the pad moving to avoid heat buildup.
After buffing, wipe the area with a clean microfiber cloth. The paint should look shiny and blend well with the rest of the car. Repeat if needed, but avoid over-buffing.
Common Mistakes To Avoid
Touching up car paint can improve your vehicle’s appearance quickly. Avoid common mistakes to get the best results. Small errors can cause uneven color or texture issues. Learn what to watch out for before starting your touch-up project.
Overloading Paint
Applying too much paint is a frequent error. Thick layers take longer to dry and can drip. Paint blobs create a bumpy surface that looks unprofessional. Use thin coats and build up slowly. Let each layer dry before adding the next one.
Overloading paint also increases the chance of color mismatch. Thicker paint appears darker and uneven. Use a small brush or pen to control paint flow. Patience helps create a smooth, natural finish.
Ignoring Surface Prep
Skipping surface cleaning ruins the final look. Dirt, grease, or rust stops paint from sticking well. Always clean the area with soap and water first. Dry it completely before painting.
Light sanding removes old paint chips and roughens the surface. This step helps new paint bond better. Not sanding can cause peeling or flaking later. Use fine-grit sandpaper gently and evenly.
Prep work might seem boring but is essential. A clean, smooth surface ensures your touch-up lasts longer and looks great.
When To Consult Professionals
Knowing when to ask for professional help can save time and money. Some paint issues require expert skills for the best results. Small scratches and chips might be fixable at home. Large or complex damage often needs a professional touch. Understanding these limits helps protect your car’s look and value.
Severe Damage
Severe paint damage includes deep scratches, dents, and rust spots. These problems affect the metal beneath the paint. DIY touch-ups rarely fix such issues properly. Professionals use special tools and materials to repair deep damage. They also ensure the paint matches perfectly. Attempting serious repairs yourself may worsen the damage.
Older Paint Considerations
Older paint can fade or change color over time. Matching old paint with new touch-up paint is difficult. Professionals have techniques to blend new paint with aged surfaces. They can also handle clear coat differences. This ensures a smooth, uniform finish. DIY methods may leave visible patches or uneven color on older paint.
Credit: carpaintchiprepair.com
Frequently Asked Questions
Can You Touch Up Paint On A Car Yourself?
Yes, you can touch up car paint yourself by using the exact paint, cleaning the area, and applying thin, blended coats carefully.
How Do You Touch Up Paint Without It Showing?
Use original paint and the same brush or roller. Apply a thin coat, feather edges with light strokes, and mimic texture by dabbing. Clean the surface first to ensure smooth blending and avoid visible lines or shiny spots.
How To Properly Touch Up Paint Chips On A Car?
Clean the chip area thoroughly. Use matching touch-up paint and a fine brush. Apply thin layers starting at the center. Feather edges gently to blend with surrounding paint. Let each coat dry before adding the next for a smooth, seamless finish.
Do Touch Up Paint Pens Work On A Car?
Touch-up paint pens work well for small car scratches and chips. Use the exact color match for best results. Clean and dry the area before applying. Apply thin coats, allowing each to dry to avoid uneven surfaces. Pens provide a quick, easy fix but may not fully restore deep damage.
Conclusion
Touching up car paint can keep your vehicle looking fresh and new. Start with clean, dry surfaces for best results. Use the exact paint color to avoid mismatches. Apply thin coats gently and blend edges well. Take your time to let each layer dry fully.
Small chips and scratches don’t have to stay. With simple steps, you can improve your car’s appearance easily. Regular care helps maintain your car’s value and beauty. Give your car a quick touch-up and enjoy the difference.