If your vehicle’s exhaust system has a leak or a crack, you know how annoying the noise and fumes can be. Muffler cement is a simple and effective fix that can stop those leaks without needing a full replacement.
But how do you use muffler cement the right way to make sure it holds up and keeps your exhaust sealed? In this guide, you’ll learn step-by-step how to prepare the area, apply the cement correctly, and get your muffler back to working quietly and efficiently.
Stick with me, and you’ll save time, money, and avoid costly trips to the mechanic. Let’s get started!
Choosing Muffler Cement
Choosing the right muffler cement is essential for a lasting repair. The correct product ensures a strong seal on your vehicle’s exhaust system. This section covers the key points to help you pick the best cement for your needs.
Types Of Muffler Cement
Muffler cement comes in different forms. There is paste, putty, and liquid types. Paste is thick and easy to apply on seams. Putty allows molding for irregular shapes. Liquid cement is good for quick, thin layers. Each type suits specific repair jobs.
Best Brands For Durability
Durability matters for muffler cement. Permatex and JB Weld are popular brands. They offer heat resistance and strong bonding. These brands perform well under high temperatures. Choosing a trusted brand reduces the chance of leaks later.
Where To Buy In Austin, Texas
Austin has many stores selling muffler cement. Auto parts shops like AutoZone and O’Reilly Auto Parts stock top brands. Hardware stores such as Home Depot and Lowe’s also carry them. Online stores offer wide selections with delivery options.
Preparing The Surface
Preparing the surface is the first step to using muffler cement properly. A clean and well-prepared area ensures the cement bonds strongly. This prevents leaks and extends the life of your exhaust repair. Focus on finding leaks, cleaning the area, and gathering the right tools.
Locating Exhaust Leaks
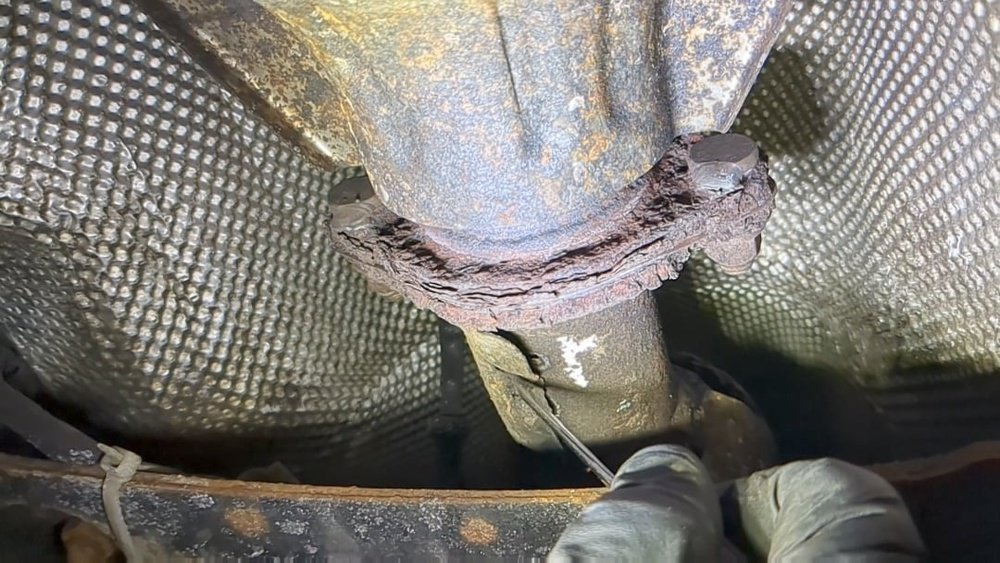
Start by checking the exhaust system for leaks. Listen for hissing or popping sounds while the engine runs. Look for black soot marks or rust spots on the muffler and pipes. Use a flashlight to inspect hard-to-see areas. Mark any damaged spots clearly before repair.
Cleaning And Scuffing Techniques
Remove dirt, grease, and rust from the leak area. Use a wire brush or sandpaper to scuff the surface. This helps the cement stick better. Wipe the area with a clean cloth to remove dust. Make sure the surface is dry and free of oil before applying cement.
Tools Needed For Preparation
Gather tools like a wire brush, sandpaper, and a clean rag. You may also need a flashlight to find leaks. Gloves protect your hands while cleaning. Have a small scraper or putty knife ready to remove loose rust or debris. Proper tools make the job easier and more effective.
Applying Muffler Cement
Applying muffler cement is a simple and effective way to seal leaks in your exhaust system. Proper application ensures a strong, lasting bond that keeps harmful gases from escaping. This section covers important tips on mixing, handling, and applying the cement correctly.
Mixing And Handling Tips
Start by cleaning the surface to remove dirt and rust. Use a wire brush or sandpaper for best results. Mix the muffler cement thoroughly before use. Stir the paste until it has a smooth, uniform texture. Use gloves to protect your hands from chemicals. Keep the cement in a sealed container to prevent drying out. Work in a well-ventilated area to avoid inhaling fumes.
Step-by-step Application Process
First, remove any loose debris from the repair area. Apply a thin layer of muffler cement over the leak or joint. Spread the cement evenly using a putty knife or your gloved fingers. Press the cement firmly into cracks and holes for a tight seal. Allow the cement to dry for the time recommended on the package. Avoid moving the parts during drying to maintain a strong bond.
Using Clamps And Assembly Paste
Clamps help hold parts together while the cement cures. Place the clamp around the repaired section and tighten it securely. Assembly paste can be applied alongside muffler cement for extra sealing power. Use only a thin layer of paste to avoid interfering with the clamp’s grip. Check clamps regularly to ensure they stay tight. Proper clamping improves the durability of your repair.

Credit: www.youtube.com
Curing And Drying Times
Curing and drying times play a crucial role when using muffler cement. Proper curing ensures a strong, lasting seal on your exhaust system. Rushing this process can cause leaks or failure. Understanding the right conditions and timing improves repair quality and safety.
Optimal Conditions For Drying
Drying works best in warm, dry environments. Temperatures between 70°F and 90°F speed up curing. Avoid high humidity or rain during drying, as moisture can weaken the bond. Good airflow helps the cement harden evenly and faster. If working in cooler weather, allow extra drying time.
How Long To Wait Before Use
Wait at least 24 hours before using the vehicle. Some brands may suggest 48 hours for full strength. Avoid starting the engine or driving too soon. Heat from the exhaust will help cure the cement but can also cause damage if uncured. Follow the product instructions for exact wait times.
Signs Of Proper Cure
The cement should feel hard and dry to the touch. It should no longer be sticky or soft. The color may change from wet to a dull, solid finish. A properly cured seal will resist pressure and vibration without cracking. If the cement shows any softness or gaps, allow more drying time.
Maintenance And Longevity
Maintaining your muffler repair ensures it lasts longer and works well. Proper care helps avoid frequent fixes and protects your vehicle’s exhaust system. Regular checks and smart steps keep the muffler cement strong and effective.
Inspecting Repairs Regularly
Check the repaired area every few weeks. Look for cracks, holes, or signs of peeling cement. Listen for unusual noises from the exhaust. Early spotting of damage helps prevent bigger problems. Use a flashlight to see hard-to-check spots clearly.
Tips To Extend Repair Life
Keep the area clean and dry. Remove dirt, rust, or grease before applying cement. Avoid driving through deep water or mud, which can weaken the repair. Let the cement cure fully before using the vehicle. Follow the product’s instructions exactly for best results.
When To Reapply Or Replace
Reapply muffler cement if cracks or gaps appear. If leaks continue or the cement peels off, a new application is needed. Replace the muffler if damage is large or the repair fails repeatedly. Proper timing saves money and keeps the exhaust safe and quiet.

Credit: www.youtube.com
Common Mistakes To Avoid
Using muffler cement might seem easy, but many people make common mistakes. These errors can cause the cement to fail or not stick properly. Avoiding these mistakes helps ensure a strong, long-lasting seal on your muffler. Below are key mistakes to watch out for.
Applying On Dirty Surfaces
One of the biggest mistakes is applying muffler cement on dirty surfaces. Dirt, grease, and rust prevent the cement from bonding well. Always clean the area thoroughly before applying. Use a wire brush or sandpaper to remove rust and dirt. Wipe the surface with a clean cloth to remove dust. A clean surface improves adhesion and seal strength.
Using Incorrect Cement Types
Not all muffler cements are the same. Using the wrong type can cause weak seals or damage. Make sure to use cement designed for high temperatures and exhaust systems. Some cements are for tailpipes only and won’t withstand heat near the engine. Check product labels carefully to find the right type. Using proper cement ensures durability and safety.
Skipping Preparation Steps
Skipping preparation steps leads to poor results. Preparation includes cleaning, drying, and sometimes roughening the surface. These steps help the cement bond better. Also, check for any gaps or holes that need filling before applying cement. Follow the instructions exactly. Taking time to prepare increases the chance of a successful repair.
Alternatives To Muffler Cement
Finding alternatives to muffler cement can help in various repair situations. Different products and methods offer unique benefits. Choosing the right one depends on the repair needs, tools available, and budget. Below are common alternatives that work well for exhaust fixes.
Exhaust Assembly Pastes
Exhaust assembly pastes are thick, heat-resistant compounds. They create a tight seal around joints and leaks. These pastes stick well to metal surfaces and resist high temperatures. Applying them is simple and requires no special tools. Assembly pastes dry quickly and fill small gaps effectively. They also reduce noise from exhaust leaks.
Metal Patch And Welding Options
Metal patches provide a strong, permanent fix for large holes. They usually require cutting a patch to size and securing it over the damaged area. Welding is the strongest repair method for exhaust systems. It fuses metal pieces to restore the exhaust’s integrity. Welding needs special equipment and expertise. Metal patches can be attached with clamps or adhesives if welding is not possible.
Pros And Cons Of Each Method
Exhaust pastes offer easy application and quick fixes. They work well for small leaks but may not last long on big holes. Metal patches provide a durable repair but need more work and tools. Welding ensures a permanent seal but requires skills and equipment. Pastes are affordable and user-friendly, while metal patches and welding offer reliability and strength.
Expert Tips For Lasting Repairs
Ensuring a lasting repair with muffler cement requires attention to detail and proper technique. These expert tips help enhance the bond strength and durability of your repair. Simple steps can prevent future leaks and damage.
Using Scotch-brite Pads For Scuffing
Start by cleaning the repair area thoroughly. Use a Scotch-Brite pad to scuff the surface gently. This roughens the metal, helping the cement stick better. Avoid heavy sanding that may damage the metal. After scuffing, wipe the area with a clean cloth to remove dust and debris.
Combining Cement With Clamps
Apply a thin layer of muffler cement over the scuffed area. Press the cement firmly into cracks or holes. Use clamps to hold parts together while the cement cures. Clamps improve pressure and create a tighter seal. Leave the clamps on until the cement fully dries for best results.
Safety Precautions During Application
Work in a well-ventilated area to avoid inhaling fumes. Wear gloves to protect your skin from irritation. Keep the cement away from open flames or sparks. Follow the manufacturer’s instructions for safe use and drying times. Proper safety ensures a smooth, hazard-free repair process.

Credit: www.jbweld.com
Conclusion
Using muffler cement properly ensures a strong, lasting seal on exhaust leaks. Always start by cleaning and drying the area well. Apply the cement evenly over the leak or joint. Let it dry completely before testing the repair. This simple process helps keep your exhaust system running smoothly.
Regular checks can catch new leaks early. With careful use, muffler cement can save time and money on repairs. Remember, a good seal protects your vehicle and reduces noise. Keep your tools ready and follow the steps for best results.