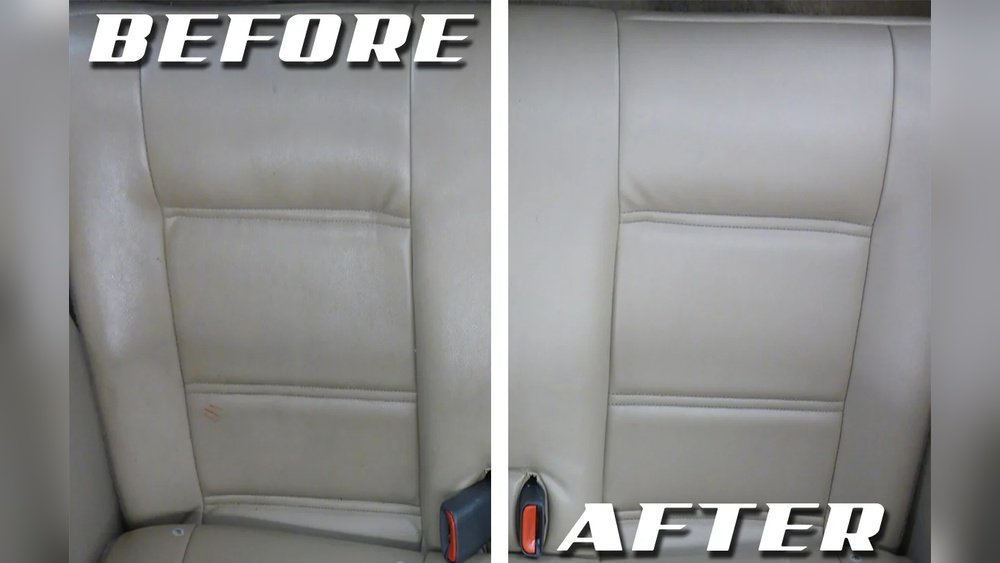
Leather car seats bring style and comfort to any car. But when stains appear—whether from coffee, ink, food, or other sources—they can ruin the look fast. Many car owners feel unsure how to tackle these stains without damaging their seats.
Leather is not like fabric; it needs special care. Using the wrong method can dry out, crack, or discolor the leather.
This guide gives you practical, step-by-step advice for removing stains from leather car seats. You’ll learn which cleaning methods work best for different types of stains, what products to use, and how to avoid common mistakes. With this knowledge, you can restore your seats and keep them looking great for years.
Understanding Leather Car Seats
Leather in cars is not all the same. Most modern car seats use top-grain leather or split leather. Some luxury vehicles use full-grain leather, which is thicker and more durable. Most car leather is finished with a protective coating, making it more resistant to stains than untreated leather. However, this coating can wear down over time, especially on older cars.
Knowing your seat type helps you choose the right cleaning products. If you’re unsure, check your car’s manual or contact your dealer. Using products made for synthetic leather on real leather can cause damage, so always verify before cleaning.
Why Stains Happen
Leather is porous. This means liquids and oils can soak into the surface, especially if the protective coating is thin or damaged. Common causes of stains include:
- Spilled drinks: Coffee, soda, juice
- Food: Grease, ketchup, chocolate
- Ink: Pens, markers
- Body oils: Sweat, sunscreen, lotion
- Dirt and mud: From shoes or clothes
Quick action is key. The longer a stain sits, the deeper it gets. Some stains, like ink, can set in just minutes.
/how-to-clean-leather-car-seats-5204366-07-c3e3dbdf4eef4c3cad5c8de095d0b54d.JPG)
Credit: www.thespruce.com
Preparing To Clean Leather Car Seats
Before you start cleaning, gather the right tools and supplies. Using the wrong materials can scratch or discolor the leather.
What you’ll need:
- Soft microfiber cloths
- Distilled water (not tap water)
- Leather cleaner or mild soap
- Leather conditioner
- Soft-bristled brush
- Cotton swabs (for small stains)
- Vacuum cleaner with a brush attachment
- Rubbing alcohol (for ink stains)
- Baking soda (for oil stains)
- Hydrogen peroxide (for tough stains)
- Protective gloves
Safety tips:
- Always test any cleaner on a hidden area first.
- Avoid strong chemicals like bleach or ammonia.
- Work in a well-ventilated area.
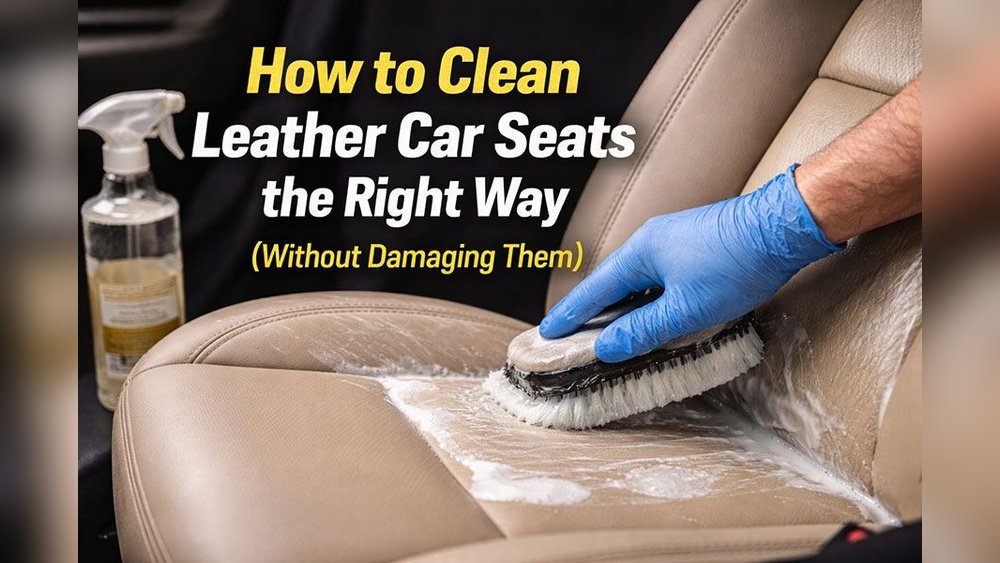
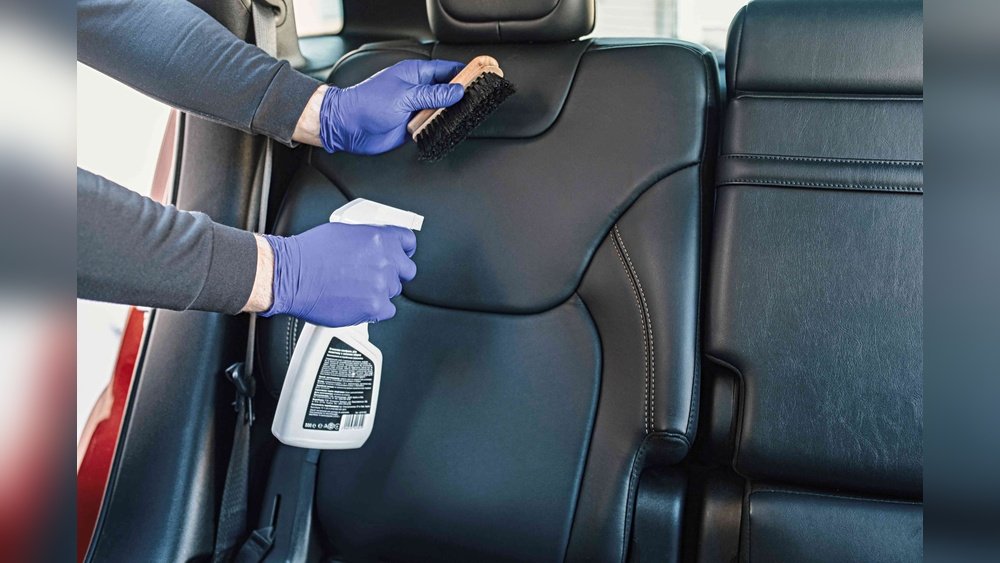
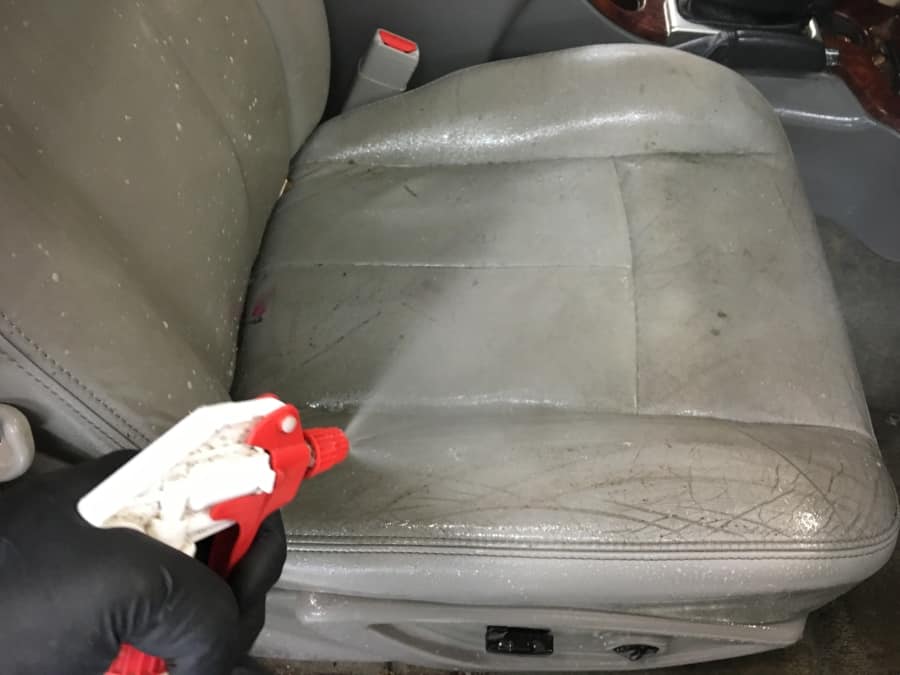
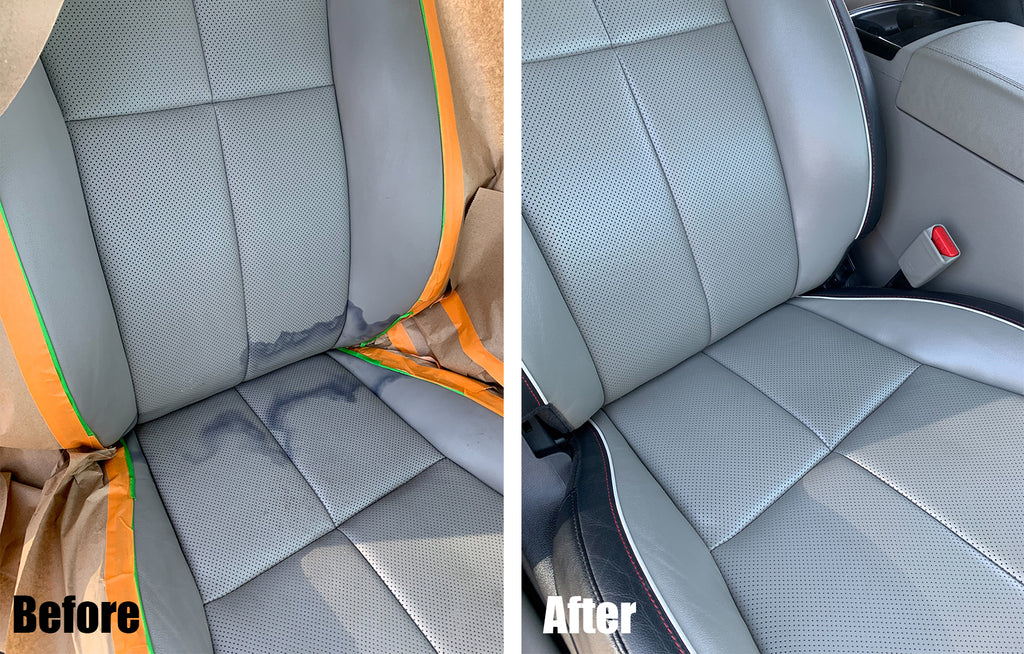
Step-by-step Guide To Removing Stains
1. Vacuum And Wipe Down The Seats
Start by removing loose dirt and debris. Use a vacuum with a soft brush attachment. This prevents scratching. Next, gently wipe the seats with a clean, damp microfiber cloth.
2. Identify The Type Of Stain
Different stains need different treatments. Here’s how to spot them:
- Greasy stains: Shiny or dark spots, usually from food or skin oils
- Liquid stains: Coffee, juice, or soda
- Ink stains: Blue or black marks from pens
- Mud or soil: Brown patches from shoes
- Dye transfer: Color from jeans or clothing
3. Choose The Right Cleaning Method
For Greasy Stains
Sprinkle a small amount of baking soda on the spot. Let it sit for 8–12 hours. Baking soda absorbs oils. After waiting, wipe it off with a dry cloth. For tough stains, repeat.
For Liquid Stains
Blot up as much liquid as possible with a dry microfiber cloth. Mix a few drops of mild soap (like baby shampoo) with distilled water. Dampen a cloth and gently wipe the stain in small circles. Avoid soaking the leather.
For Ink Stains
Dip a cotton swab in rubbing alcohol. Lightly dab the ink spot. Do not rub hard—this can spread the stain. After a few dabs, wipe with a clean damp cloth. If needed, repeat once.
For Mud Or Soil
Let mud dry completely. Gently brush off loose dirt with a soft-bristled brush. Use a mild soap solution to clean remaining stains, wiping gently.
For Dye Transfer
Apply a small amount of leather cleaner to a microfiber cloth. Rub the stain gently. If the color does not lift, try a specialized dye remover made for leather.
For Tough Stains
Some stains are stubborn, especially if they’ve set. For these, mix hydrogen peroxide (3%) with water (1:1). Dampen a cloth and blot the stain. Rinse with distilled water after.
4. Conditioning And Protecting Leather
After cleaning, leather can dry out. Apply a leather conditioner to restore moisture and shine. Use a clean cloth, following product instructions. Conditioning prevents cracks and keeps leather soft.
5. Drying And Finishing
Let seats air dry. Do not use heat or direct sunlight—it can shrink or crack the leather. If your car must be used soon, open windows for airflow.
Comparing Leather Cleaners
Many products claim to clean leather safely. Here’s a quick comparison of popular options:
| Product | Best For | Pros | Cons |
|---|---|---|---|
| Leather Honey | General cleaning, conditioning | Natural, non-toxic, long-lasting | Expensive, not for ink stains |
| Meguiar’s Gold Class | Deep stains | Effective, easy to use | Contains chemicals, strong smell |
| Lexol Leather Cleaner | Delicate leather | Mild, gentle formula | Needs separate conditioner |
| Homemade soap solution | Quick, light stains | Cheap, easy to make | Not for tough stains |
Common Mistakes To Avoid
Even experienced car owners make errors. Here are mistakes that can damage leather or make stains worse:
- Using harsh chemicals: Bleach, ammonia, or strong cleaners can destroy leather’s finish.
- Scrubbing hard: Rubbing can spread stains and wear down the surface.
- Skipping conditioner: Cleaning removes oils—without conditioner, leather dries out.
- Letting stains sit: Fast action is key. The longer a stain stays, the harder it is to remove.
- Using colored cloths: Dye from cloths can transfer onto leather, making new stains.
- Not testing cleaners: Always try products in a hidden spot first.
Real-life Examples
A recent study from the International Carwash Association found that 67% of car owners who cleaned stains themselves improved seat appearance, but 23% made stains worse by using incorrect products. One owner tried using window cleaner on ink stains and ended up with faded, rough leather. Another used a homemade vinegar solution, which removed the stain but left the seat dry and cracked.
If you accidentally use the wrong product, rinse the area with distilled water and apply conditioner. Sometimes, professional repair is needed.
How Often Should You Clean Leather Seats?
Regular care keeps stains away and extends seat life. Most experts recommend:
- Light cleaning every month
- Deep cleaning and conditioning every 3–6 months
- Immediate spot cleaning for new stains
Cars used daily, or with kids and pets, may need more frequent cleaning. Neglecting seats leads to cracks, fading, and permanent stains.
Diy Cleaning Vs. Professional Cleaning
You can clean most stains at home. However, deep stains or damage may need professional help. Professionals use specialized tools and products. This can be costly—usually $100–$200 per session—but offers better results for tough stains.
Here’s a quick comparison:
| Cleaning Type | Cost | Results | Best For |
|---|---|---|---|
| DIY | $5–$30 | Good for light stains | Fresh or small stains |
| Professional | $100–$200 | Excellent for deep stains | Set-in, large stains |
How To Prevent Stains On Leather Seats
Prevention is easier than cleaning. Here’s how to protect your seats:
- Use seat covers for everyday protection
- Avoid eating or drinking in the car
- Clean up spills right away
- Apply leather protector every 6 months
- Keep sharp objects away from seats
- Avoid direct sunlight—UV rays fade leather
One overlooked tip: keep a microfiber cloth in your glove box. Quick access lets you blot spills before they become stains.
Credit: avalonking.com
Special Cases: Removing Stains From Perforated Leather
Perforated leather has small holes for ventilation. Cleaning it needs extra care.
- Use minimal liquid to avoid soaking holes.
- Blot gently, never scrub.
- Use a vacuum to remove moisture from holes.
- Apply conditioner sparingly.
This is a common beginner mistake—using too much liquid can cause mold or damage inside the seat.
Dealing With Odors After Stain Removal
Sometimes, stains leave behind smells. To handle odors:
- Sprinkle baking soda, leave for 12 hours, then vacuum.
- Use a leather-safe odor eliminator spray.
- Avoid air fresheners that contain alcohol.
A hidden insight: odors often linger in seams and folds, not just the main seat area. Clean these spots carefully.
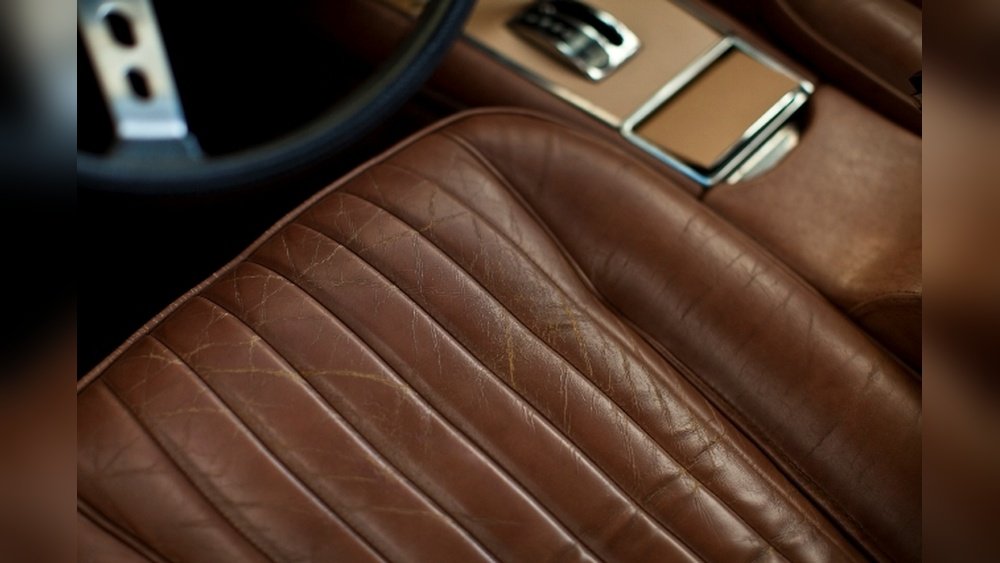
Understanding Leather Age And Condition
Older leather is more fragile. Cracks and fading make cleaning harder. If your seats are over five years old, use extra caution.
- Choose mild products only.
- Avoid heavy brushing.
- Condition twice after cleaning.
If leather is peeling or has deep cracks, consider professional repair instead of cleaning.
Comparing Leather Cleaning Tools
Choosing the right tool makes a big difference. Here’s a quick look:
| Tool | Use | Pros | Cons |
|---|---|---|---|
| Microfiber cloth | Wiping, blotting | Soft, won’t scratch | Can’t remove deep stains |
| Soft-bristled brush | Loosening dirt | Good for textured leather | Too harsh for old leather |
| Cotton swab | Small stains | Precise | Limited coverage |
| Vacuum with brush | Removing debris | Effective, fast | Needs careful use |
Credit: www.colorbondpaint.com
Choosing The Right Leather Conditioner
Conditioners help restore shine and softness after cleaning. Look for:
- PH-balanced formulas
- No silicone or wax (these block pores)
- Added UV protection
- Easy application
Popular brands include Leather Honey and Lexol. Be sure to follow instructions—using too much can cause sticky residue.
What To Do If Stains Won’t Come Out
If you try several methods and the stain remains:
- Stop cleaning to avoid damage.
- Contact a professional detailer.
- Ask about leather dyeing—sometimes, re-coloring is needed.
- Consider seat reupholstering for deep damage.
In some cases, a stain is permanent. Regular care prevents this.
Frequently Asked Questions
How Do I Know If My Car Seats Are Real Leather Or Synthetic?
Check your car’s manual or look for tags under the seats. Real leather feels warm and soft, while synthetic leather is cooler and smoother. Synthetic leather may have a repeating grain pattern.
Can I Use Regular Soap Or Household Cleaners On Leather Seats?
Most household cleaners are too harsh. Use only mild soap or leather-specific products. Avoid bleach, ammonia, and strong detergents.
How Often Should I Condition Leather Car Seats?
Condition seats every 3–6 months, or after any cleaning session. Conditioning keeps leather soft and prevents cracks.
Are Home Remedies Safe For Leather Seats?
Some home remedies work—like baking soda for oil stains or mild soap for light spots. Always test on a hidden area first. Avoid vinegar and lemon juice; they can dry out leather.
What Should I Do If I Spill Coffee On Leather Seats?
Blot the spill immediately with a microfiber cloth. Clean with mild soap and distilled water. Dry and condition afterward.
Removing stains from leather car seats is easier than it seems when you know the right steps. Fast action, gentle products, and regular care protect your seats and keep your car looking sharp. With these tips, you can handle most stains yourself, saving money and keeping your car in top condition. For more in-depth car care advice, visit Consumer Reports. Remember, prevention is just as important as cleaning. Keep your seats safe, and enjoy a comfortable, stylish ride every day.