Keeping your truck or SUV’s leather seats clean isn’t just about looks. It’s about protecting your investment and making every drive more comfortable. Leather feels luxurious, but it also needs special care. Neglect can lead to cracks, fading, and even a sticky feeling in hot weather. Many drivers worry about damaging leather while cleaning, or they think it’s a job for professionals only. The truth is, with the right approach, you can handle this task at home and achieve great results.
In this guide, you’ll learn everything needed to clean, care for, and maintain leather seats in trucks and SUVs. Whether your seats are lightly used or have seen years of family road trips, you’ll discover practical steps, common mistakes, and pro tips most people miss.
Plus, you’ll find real data on products, see clear comparisons, and get answers to frequent questions—all within one easy-to-follow article.
Understanding Leather Seats In Trucks And Suvs
Leather seats come in different types and finishes. Most trucks and SUVs use top-grain or full-grain leather, which is durable and feels soft. Some vehicles use synthetic leather (like vinyl or leatherette), which looks similar but has a different cleaning process.
Why does this matter? Using the wrong cleaner or technique can damage the finish, cause discoloration, or even void your warranty. Before starting, check your owner’s manual or the tag under the seat to identify your leather type.
Main Types Of Leather Used
- Full-grain leather: Best quality, ages well, but needs gentle care.
- Top-grain leather: Common in premium SUVs, smooth, easier to clean.
- Corrected-grain leather: Treated for uniform look, less sensitive.
- Leatherette/vinyl: Synthetic, more resistant to stains and scratches.
Non-obvious insight: Many truck owners don’t realize that perforated leather (with tiny holes) is extra sensitive to moisture and cleaning agents. It’s often used in ventilated seats, so avoid soaking or scrubbing these areas.
The Importance Of Regular Cleaning
Leather seats aren’t just about style—they’re about comfort and resale value. Dirt, sweat, oils, and spills can break down the leather’s protective coating. Over time, this leads to dryness, stiffness, and even tears.
According to a 2022 survey by J.D. Power, vehicles with well-maintained leather interiors sell for 8–15% more than similar models with worn seats. Cleaning also removes bacteria and allergens, making your cabin healthier for you and your passengers.
How Often Should You Clean?
- Light use: Every 2–3 months.
- Heavy use (kids, pets, work trucks): Every month.
- Spills or stains: Immediate spot cleaning.
Tip: Conditioning leather after every cleaning keeps it supple and prevents cracking.
Preparing For Cleaning: What You Need
Before you start, gather the right tools and products. Using household cleaners or rough brushes can ruin the finish. Here’s a breakdown of what works best:
| Item | Purpose | Recommended Type |
|---|---|---|
| Vacuum with soft brush | Removes loose dirt | Handheld or full-size |
| Microfiber cloths | Gentle wiping | Lint-free, soft |
| Leather cleaner | Removes stains | pH-balanced, automotive grade |
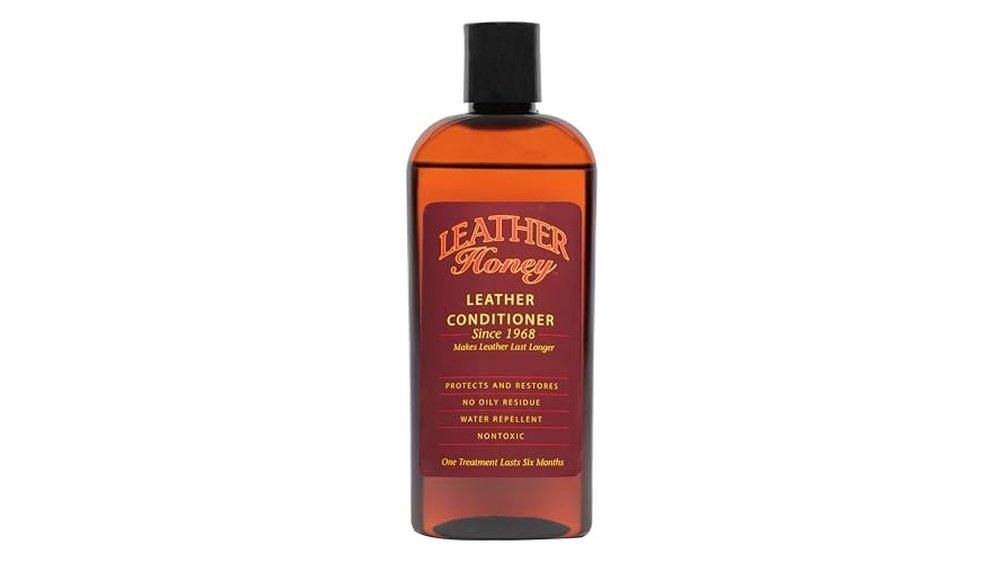
| Leather conditioner | Restores moisture | Non-greasy, UV protection |
| Soft-bristle brush | Loosens grime | Horsehair or nylon |
| Spray bottle (optional) | Even application | For diluted solutions |
Non-obvious insight: Avoid paper towels—they can scratch or leave lint. Also, never use ammonia-based cleaners, as these strip away the leather’s protective coating.
Step-by-step: Cleaning Leather Seats
Cleaning leather seats is a process, not a single step. Follow these stages for best results:
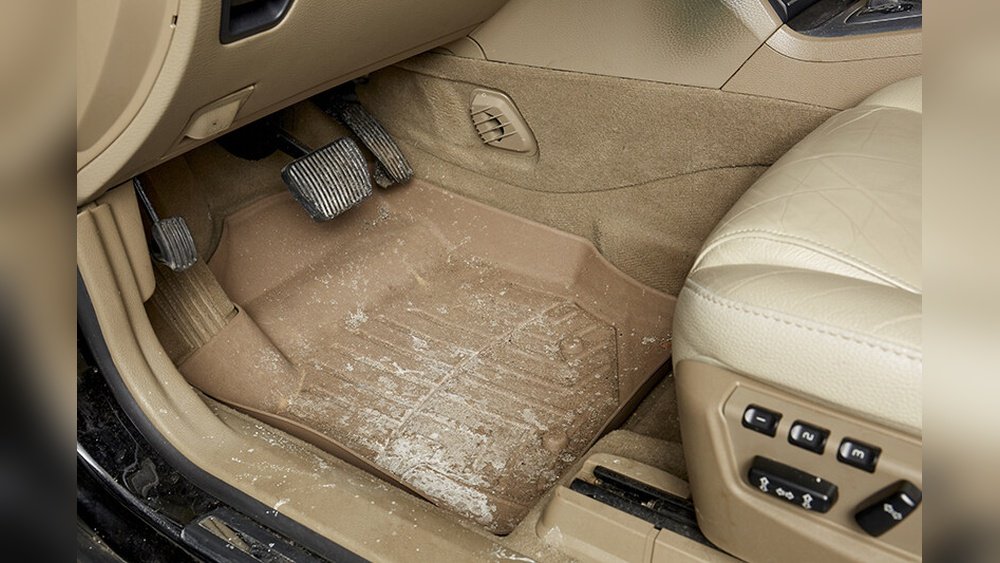
1. Remove Loose Dirt And Debris
Start by vacuuming the seats. Use a soft brush attachment to avoid scratching. Pay attention to seams, crevices, and under the seats. If your truck is used for work or family, you may find sand, crumbs, or pet hair hidden in these areas.
2. Wipe Down With Dry Microfiber
Take a clean, dry microfiber cloth and gently wipe the surface. This removes remaining dust and gives you a better view of any stains or problem spots.
3. Apply Leather Cleaner
Spray or apply a pH-balanced leather cleaner to a cloth, not directly to the seat. This prevents oversaturation. For tough stains, let the cleaner sit for 30–60 seconds.
Work in small sections (about 1–2 square feet at a time). Rub gently in circular motions. For perforated or ventilated seats, avoid excess moisture—just dab instead of rubbing.
4. Scrub Lightly With A Soft Brush
For grime in seams or textured leather, use a horsehair brush. Don’t scrub hard—just light pressure to lift dirt. Always follow the grain of the leather.
5. Remove Cleaner Residue
Wipe the area with a fresh, damp microfiber cloth. This ensures no cleaner is left behind, which could dry out or stain the leather.
6. Dry Thoroughly
Use another dry microfiber cloth to soak up any moisture. Leave the doors open for 5–10 minutes to let the seats air dry completely.
7. Apply Leather Conditioner
Once dry, use a leather conditioner. Apply a small amount to a cloth and rub in gently. Focus on high-use areas like the driver’s seat and armrests. Conditioner keeps leather soft and adds a protective layer against UV rays.
8. Buff For Shine
After 10–15 minutes, buff the seats with a clean cloth. This brings out the natural shine and removes any excess conditioner.
Example: If you drive a Ford F-150 with full-grain leather, conditioning every three months prevents the common problem of cracking on the seat edges. For a Chevy Tahoe with perforated seats, use less product and pat dry to avoid clogging the holes.
Dealing With Specific Stains And Issues
Not all stains are equal. Here’s how to handle common problems in trucks and SUVs:
Grease And Oil
Use a dedicated leather degreaser, not household soap. Apply, let sit for 30 seconds, and wipe gently. Repeat if needed.
Ink And Dye Transfer
Try a leather-specific stain remover. Do not use alcohol—it can bleach the leather. Test in a hidden area first.
Food And Beverage Spills
Blot immediately with a dry cloth. Don’t rub, as this spreads the stain. Follow up with leather cleaner.
Mold Or Mildew
For mold, mix one part white vinegar with two parts water. Dab gently, then clean with leather cleaner. Air out the cabin thoroughly.
Non-obvious insight: Many people use baby wipes for quick cleaning, but most contain chemicals that harm leather over time. Stick to products made for automotive leather.
Protecting Leather Seats: Tips For Long-term Care
Cleaning is just the start. Protecting leather seats keeps them looking new and comfortable for years.
Practical Ways To Protect Seats
- Use seat covers for work trucks or daily drivers.
- Park in shade or use sunshades to prevent UV damage.
- Avoid sharp objects like tools, keys, or pet claws.
- Condition regularly to keep leather flexible.
- Clean spills immediately to prevent staining.
Conditioning Frequency
Leather needs regular conditioning, but not too much. Over-conditioning can make seats sticky and attract dust.
| Vehicle Type | Conditioning Interval | Recommended Product Type |
|---|---|---|
| Daily use truck | Every 2 months | Heavy-duty conditioner |
| Family SUV | Every 3 months | UV-protection conditioner |
| Weekend vehicle | Every 6 months | Light conditioner |
Tip: Always test new products in a small, hidden area before applying everywhere.
Comparing Popular Leather Cleaners And Conditioners
Choosing the right product makes all the difference. Here’s a comparison of three popular brands used for trucks and SUVs:
| Brand | Cleaner Type | Conditioner Features | Average Price (16oz) | Customer Rating (out of 5) |
|---|---|---|---|---|
| Meguiar’s Gold Class | pH-balanced | UV protection, non-greasy | $12.99 | 4.7 |
| Lexol | Gentle, foaming | Restores softness | $9.99 | 4.5 |
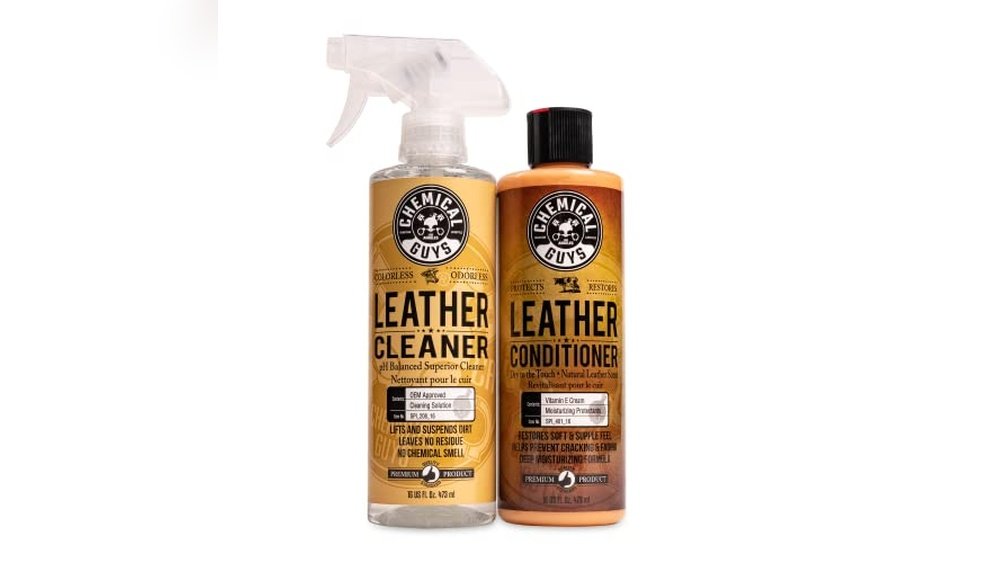
| Chemical Guys Leather Care | Gel, high cleaning power | Deep conditioning | $15.99 | 4.6 |
Non-obvious insight: Some products marketed as “all-in-one” can leave a greasy residue. Separate cleaner and conditioner steps usually give better, longer-lasting results.
Common Mistakes When Cleaning Leather Seats
Even careful owners sometimes make mistakes. Avoid these pitfalls:
- Using too much water: Leather absorbs moisture and can warp.
- Skipping conditioner: Clean leather dries out fast.
- Using harsh chemicals: Bleach, ammonia, or alcohol can ruin the finish.
- Scrubbing too hard: Causes scratches and removes protective coating.
- Ignoring seams and edges: Dirt collects here and leads to damage.
Experience-based tip: If you clean seats in direct sunlight, products dry too quickly and can leave streaks. Work in shade or indoors for best results.

Credit: www.giacomospizza.com
Expert Tips For Trucks And Suvs
Trucks and SUVs often face tougher conditions—mud, sweat, tools, kids, and pets. Here are expert strategies:
- For work trucks, use rubber mats and seat covers between deep cleanings.
- In family SUVs, keep a microfiber cloth in the glove box for quick spills.
- For heated or ventilated seats, use minimal liquid and always dry thoroughly.
Non-obvious insight: Trucks with leather steering wheels and armrests need the same care as seats. These parts get just as dirty and can crack if ignored.
Diy Vs Professional Cleaning: What’s Better?
Many drivers wonder if they should hire professionals. Professional detailing costs $75–$200 for interior cleaning, but DIY is cheaper and gives you control.
| Method | Cost | Time Required | Result Quality | Risk |
|---|---|---|---|---|
| DIY | $10–$40 (products) | 45–90 minutes | Good to excellent | Possible product misuse |
| Professional | $75–$200 | 2–3 hours | Excellent | Higher cost |
If your seats have deep stains, tears, or fading, professionals may be needed. For routine cleaning and conditioning, DIY works well.

Credit: www.amazon.com
Real-world Examples
Many truck and SUV owners have found success with regular leather care. Here are a few examples:
- Ram 1500 owner: Cleaned seats monthly, conditioned every three months. After five years, seats still looked nearly new and helped increase resale value.
- Toyota Highlander driver: Used UV-protection conditioner after every cleaning. No fading or cracking after four years parked outside daily.
- Chevrolet Suburban family: Quick spot cleaning after spills prevented permanent stains, even with kids and pets.
Frequently Asked Questions
How Do I Know If My Seats Are Real Leather Or Synthetic?
Check your vehicle’s manual or look for tags under the seat. Real leather feels warmer and softer, while synthetic leather feels cooler and more uniform. If you’re unsure, ask your dealer or search your vehicle’s specs online.
Can I Use Household Cleaners On Leather Seats?
No. Most household cleaners are too harsh and can damage leather. Always use pH-balanced, automotive-specific products. Even mild soap can strip away protective coatings.
What’s The Best Way To Handle Pet Hair On Leather Seats?
Use a vacuum with a soft brush attachment. For stubborn hair, use a slightly damp microfiber cloth. Avoid sticky rollers, as adhesive can harm leather.
How Often Should I Condition Leather Seats?
Condition every 2–3 months for regular use, and every month for heavy use. Conditioning keeps leather soft and prevents cracks. Too much conditioning can make seats sticky, so don’t overdo it.
Are There Eco-friendly Leather Cleaning Products?
Yes. Many brands offer biodegradable, non-toxic cleaners and conditioners. Look for products labeled “eco-friendly” or “plant-based.” For more information, visit EPA’s Safer Choice Program.
Taking care of leather seats in your truck or SUV isn’t complicated—it’s about using the right tools, products, and techniques. Regular cleaning and conditioning protect your investment, keep your vehicle comfortable, and help you enjoy every drive. With practical steps, smart product choices, and a little attention to detail, your leather seats can stay beautiful for years.

Credit: www.walmart.com